
")
")
Page 2 of 8
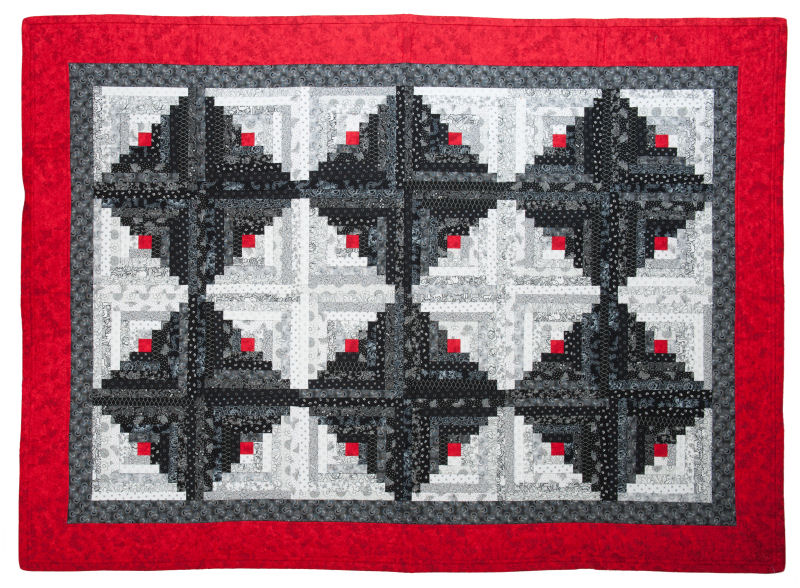
 All fabrics are neatly ironed. Now I can finally start with the blocks. I am about 21 blocks behind, so it's time. All fabrics are neatly ironed. Now I can finally start with the blocks. I am about 21 blocks behind, so it's time.Besides the emailed blocks, I will also start with the center piece and the four outer large corners. I want to make all of them from the same fabric, and there are fairly large areas in them. If I make them first, I avoid running out of the right fabric later on. |
 There are various techniques to cut and sew the fabrics in a block to the correct size. For this quilt, two techniques could be applicable: There are various techniques to cut and sew the fabrics in a block to the correct size. For this quilt, two techniques could be applicable:
I choose to use the second technique, with the rotary cutter. This technique is also known as rotary cutting. We need a large cutting mat, transparent plastic rulers, and a rotary cutter. A small sharp-pointed pair of scissors is also handy. Sometimes not all threads are cut, and you need to carefully cut the last threads with these scissors. By the way, this often means you need to replace your rotary cutter blade because it has become dull. |
 Working with the rotary cutter goes (for right-handers) as follows: Working with the rotary cutter goes (for right-handers) as follows:
If you need a strip of, for example, 1.5 inches, then the ruler is placed 1.5 inches over the fabric. The fabric to the right of the ruler is the piece that remains. |
 It's time, I can begin. It is very important to cut the blocks precisely and sew them neatly. I use a quilting foot on the sewing machine. That foot is exactly 1/4 inch wide, the same width as the seam allowances. If you let the edge of the fabrics run along with the quilting foot, you always have the correct seam allowance. It's time, I can begin. It is very important to cut the blocks precisely and sew them neatly. I use a quilting foot on the sewing machine. That foot is exactly 1/4 inch wide, the same width as the seam allowances. If you let the edge of the fabrics run along with the quilting foot, you always have the correct seam allowance. |
 The seams are not finished or zigzagged. That would create too thick lumps. After the pieces are sewn together, the seam is pressed first, and then the pieces are pressed open. If possible, the seam is pressed towards the darker side. The seams are not finished or zigzagged. That would create too thick lumps. After the pieces are sewn together, the seam is pressed first, and then the pieces are pressed open. If possible, the seam is pressed towards the darker side. |
  The first block is done. This block is somewhere in the inner dark-tinted ring. The quilt is very large. The smallest blocks are 3 inches square, which is about 7.5 by 7.5 cm. If all blocks deviate from the size, you will have problems sewing them together. All blocks are therefore measured. The first block is done. This block is somewhere in the inner dark-tinted ring. The quilt is very large. The smallest blocks are 3 inches square, which is about 7.5 by 7.5 cm. If all blocks deviate from the size, you will have problems sewing them together. All blocks are therefore measured. |
 After a few hours of sewing, I have completed the first blocks. Keep working, and then I will be back on schedule. After a few hours of sewing, I have completed the first blocks. Keep working, and then I will be back on schedule. |