
")
")
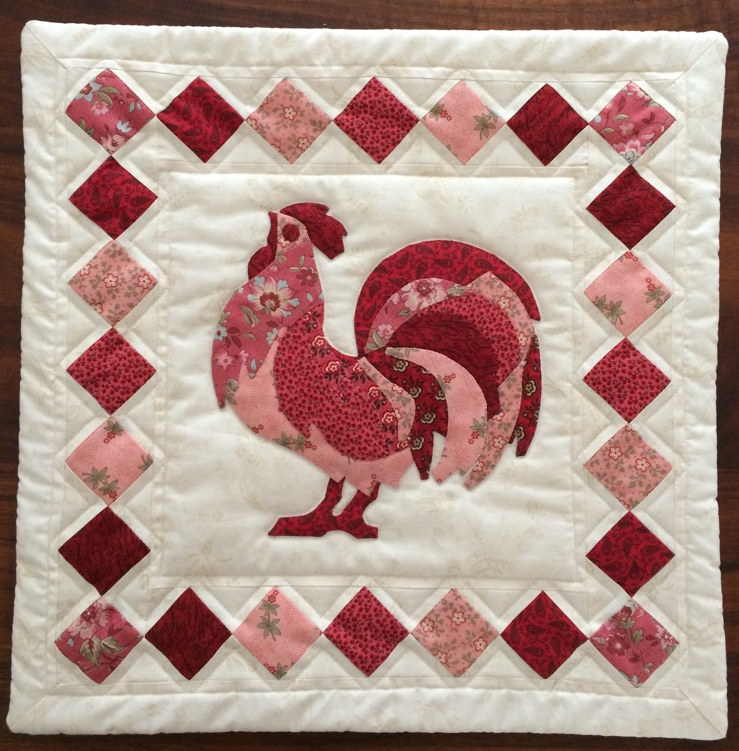
 Pillows are a beautiful subject to try out a new technique. This is a pillow that utilizes the paper piecing technique. I've already made a few pillows in these warm red tones, so a third one won't hurt. The pillow measures 40x40 cm. For an extensive explanation of paper piecing, you can also view this article. Pillows are a beautiful subject to try out a new technique. This is a pillow that utilizes the paper piecing technique. I've already made a few pillows in these warm red tones, so a third one won't hurt. The pillow measures 40x40 cm. For an extensive explanation of paper piecing, you can also view this article. |
 You can download the pattern of the pillow here. The pattern is a PDF. Before you begin, make sure to check if the squares on the measurement sheet are 1 inch each. If not, adjust your printer settings accordingly. You can download the pattern of the pillow here. The pattern is a PDF. Before you begin, make sure to check if the squares on the measurement sheet are 1 inch each. If not, adjust your printer settings accordingly. |
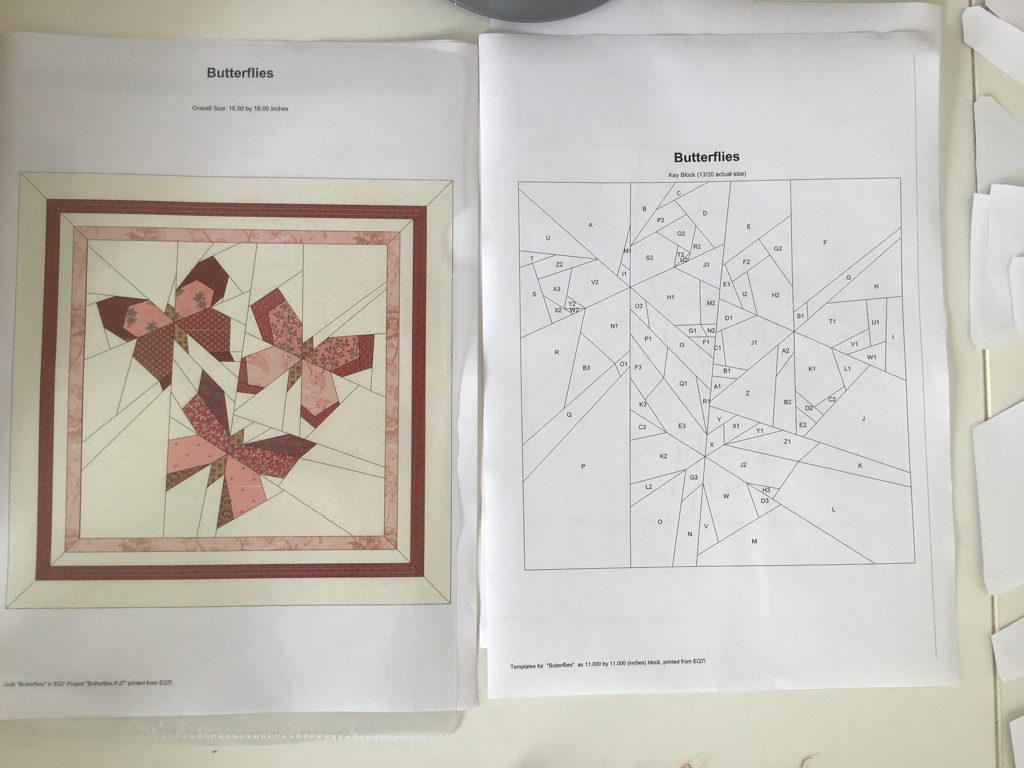 The pattern includes: The pattern includes:
|
 Start by cutting out all the templates (6). Place the templates on the correct fabric and secure them with a single pin. In the overview (5), you can see where each piece belongs in the pattern and choose the correct fabric accordingly. Once you've placed all the pieces on the correct fabric, you can cut them out. Cut the templates generously from the fabric; it doesn't need to be very precise. Start by cutting out all the templates (6). Place the templates on the correct fabric and secure them with a single pin. In the overview (5), you can see where each piece belongs in the pattern and choose the correct fabric accordingly. Once you've placed all the pieces on the correct fabric, you can cut them out. Cut the templates generously from the fabric; it doesn't need to be very precise.Keep in mind to leave enough fabric for the white bias and back of the pattern. The pillow measures 40x40 cm; you'll need 4 white biases of approximately 17 inches in length and 1.5 inches in width, and 4 white biases of approximately 14 inches and 1 inch in width. For the back, you'll need approximately 41 by 60 cm. For the light and dark red biases, you'll need 4 strips of 1 inch in width and a maximum of 16 inches in length each. |
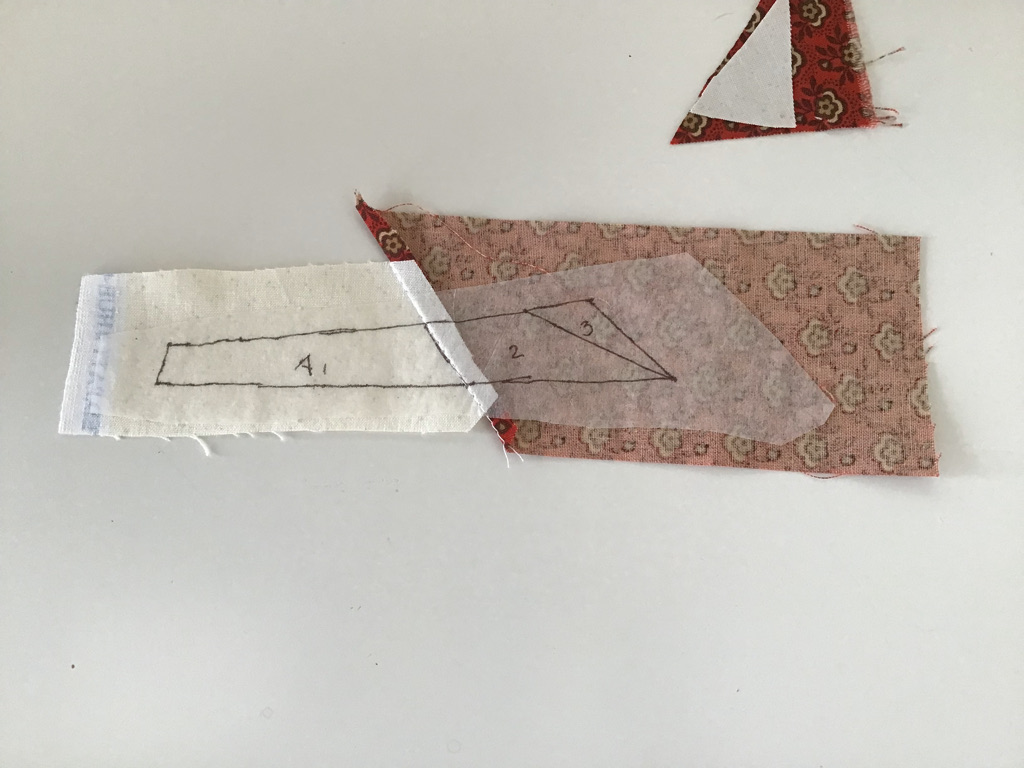
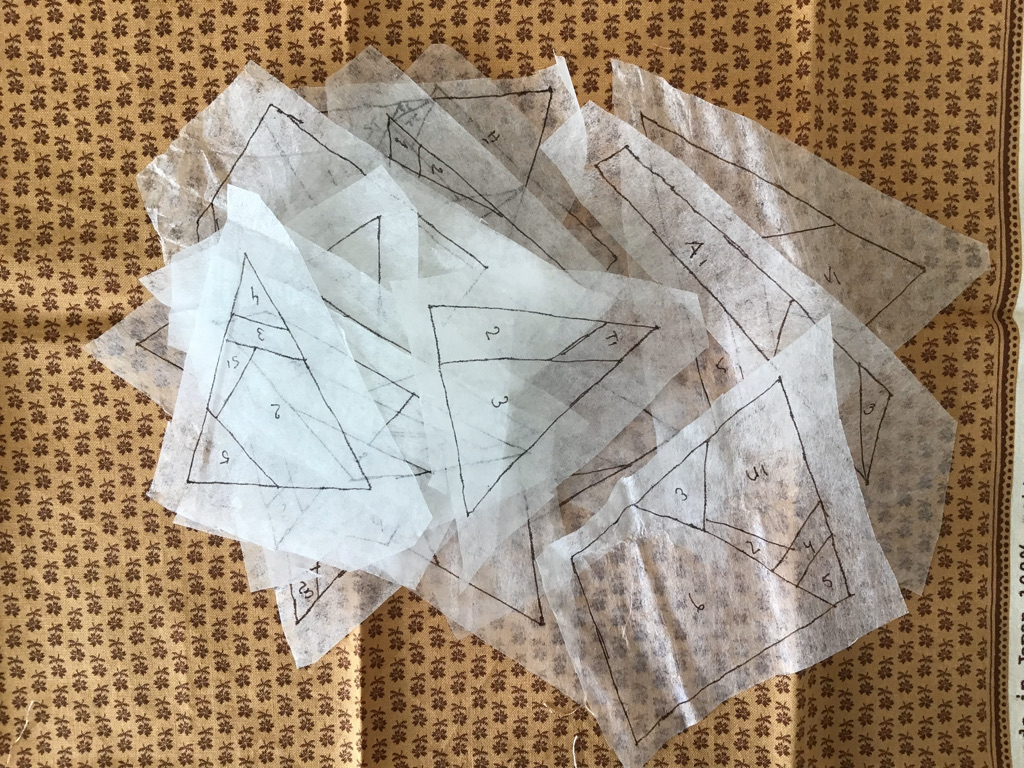 Transfer the paper piecing patterns (4) onto tea bag paper. If you search for tea bag paper online, you'll find various online stores that sell it. The pieces of (4) are already mirrored, so you can place the translucent tea bag paper over the print and trace the pattern with a pencil or thin pen. Make sure to transfer all the text; this prevents you from accidentally sewing on the wrong side and messing up your pattern. I always make sure the patterns are not too close to each other so I can cut them out with some space. Transfer the paper piecing patterns (4) onto tea bag paper. If you search for tea bag paper online, you'll find various online stores that sell it. The pieces of (4) are already mirrored, so you can place the translucent tea bag paper over the print and trace the pattern with a pencil or thin pen. Make sure to transfer all the text; this prevents you from accidentally sewing on the wrong side and messing up your pattern. I always make sure the patterns are not too close to each other so I can cut them out with some space. |
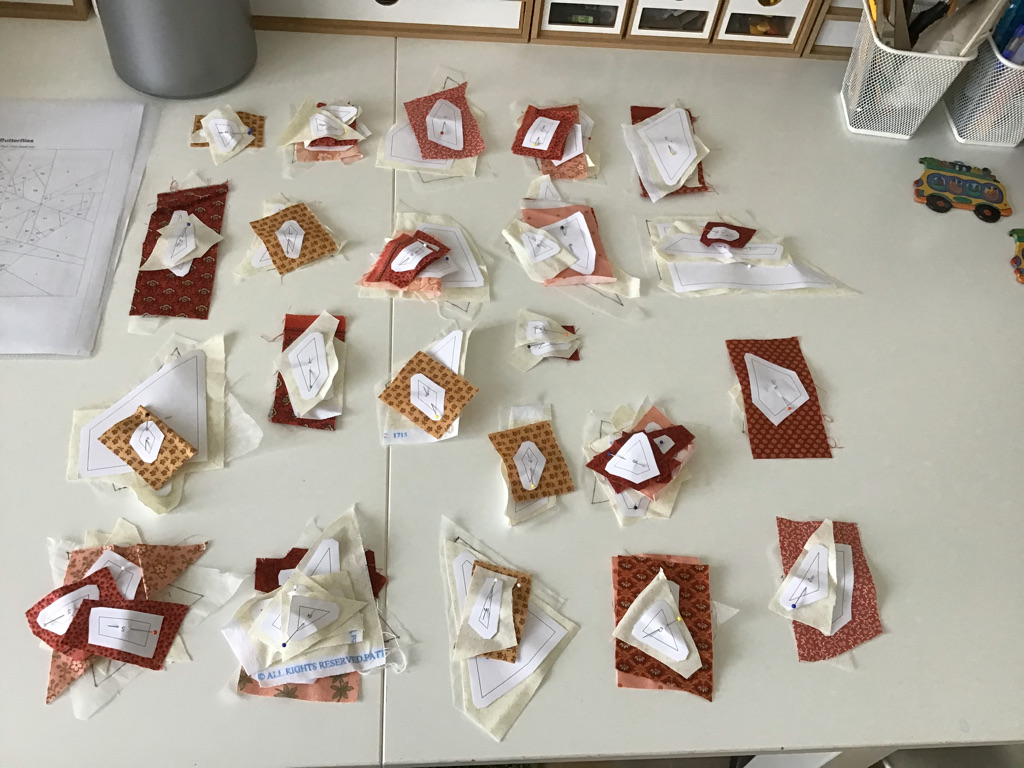 Now, sort all the cut-out templates and paper piecing patterns. Place the corresponding pattern pieces on each paper piecing pattern you've cut from tea bag paper. This prevents you from making mistakes when sewing them together. Now, sort all the cut-out templates and paper piecing patterns. Place the corresponding pattern pieces on each paper piecing pattern you've cut from tea bag paper. This prevents you from making mistakes when sewing them together. |
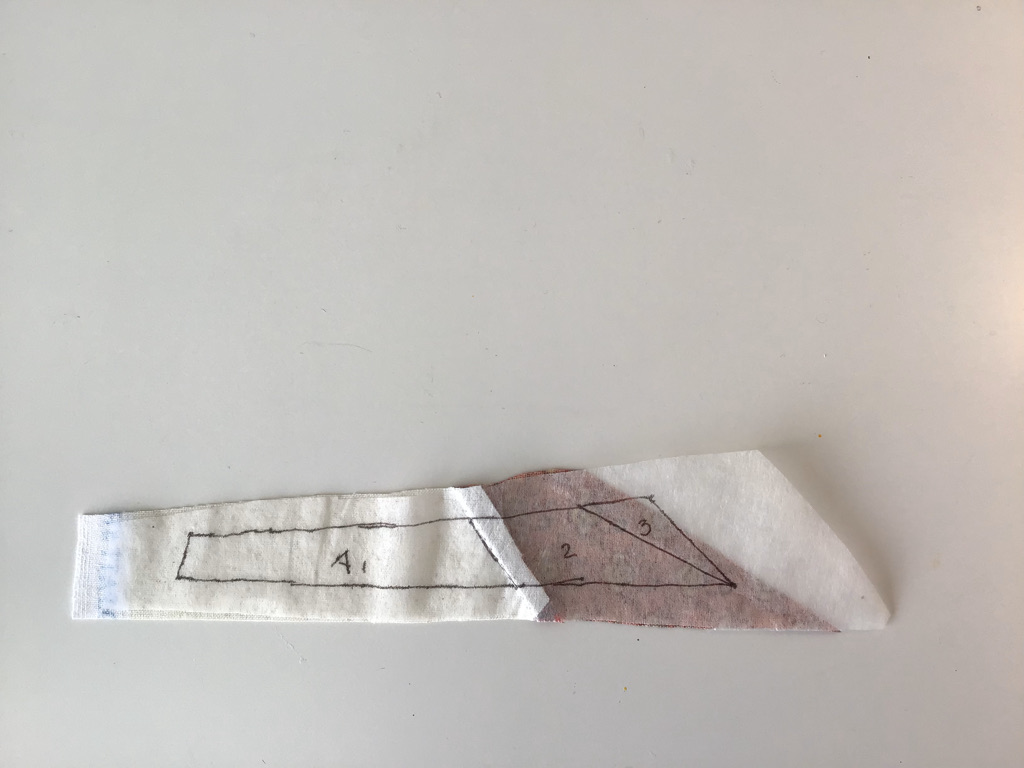
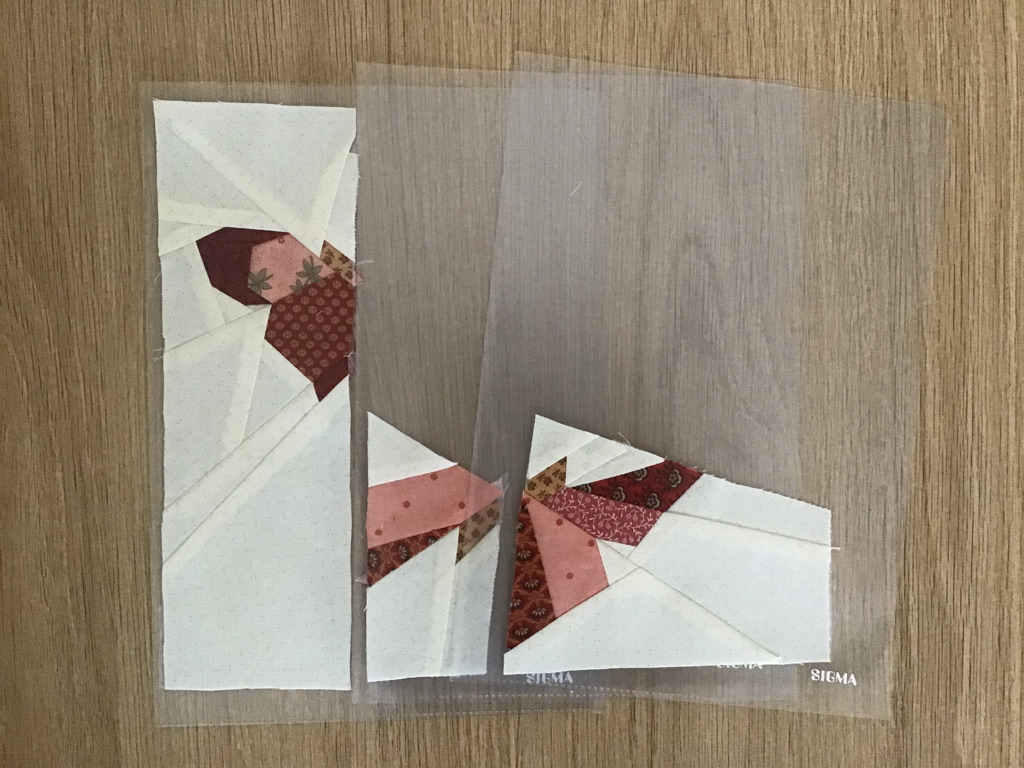
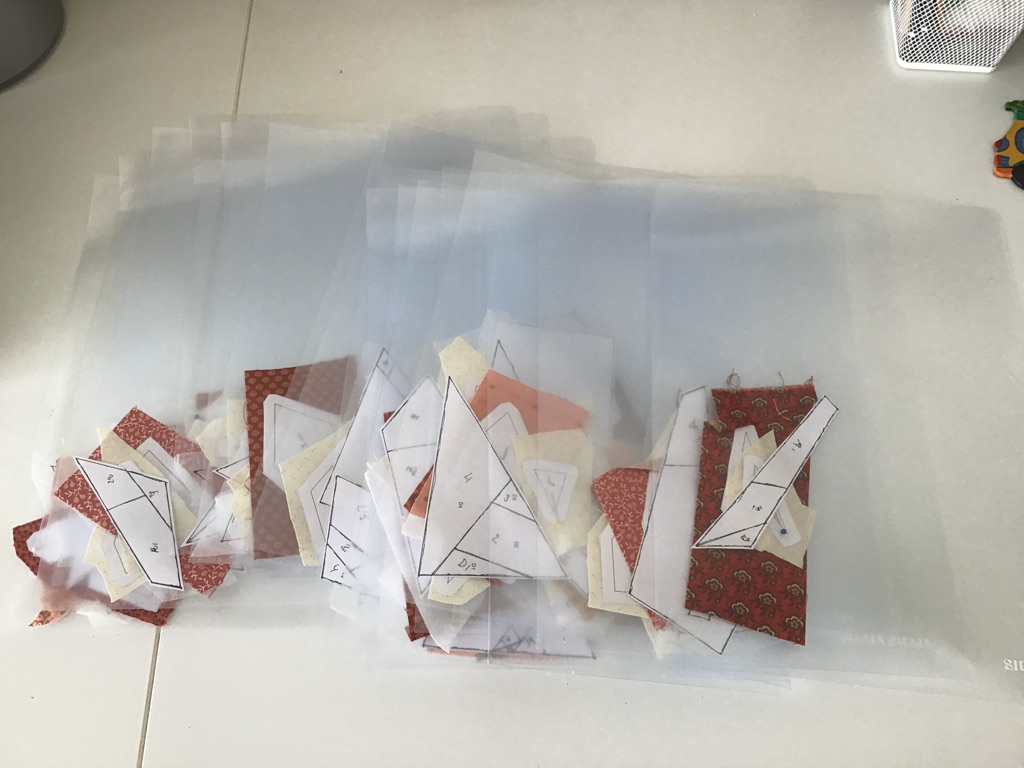 I find it convenient to put each set in a transparent sleeve now. I don't always have time to sew everything together in one go, so this keeps it organized. I sort the sleeves, with paper piecing pattern A in the front and part U, the last part, at the back. All the preparatory work is now done. I find it convenient to put each set in a transparent sleeve now. I don't always have time to sew everything together in one go, so this keeps it organized. I sort the sleeves, with paper piecing pattern A in the front and part U, the last part, at the back. All the preparatory work is now done. |
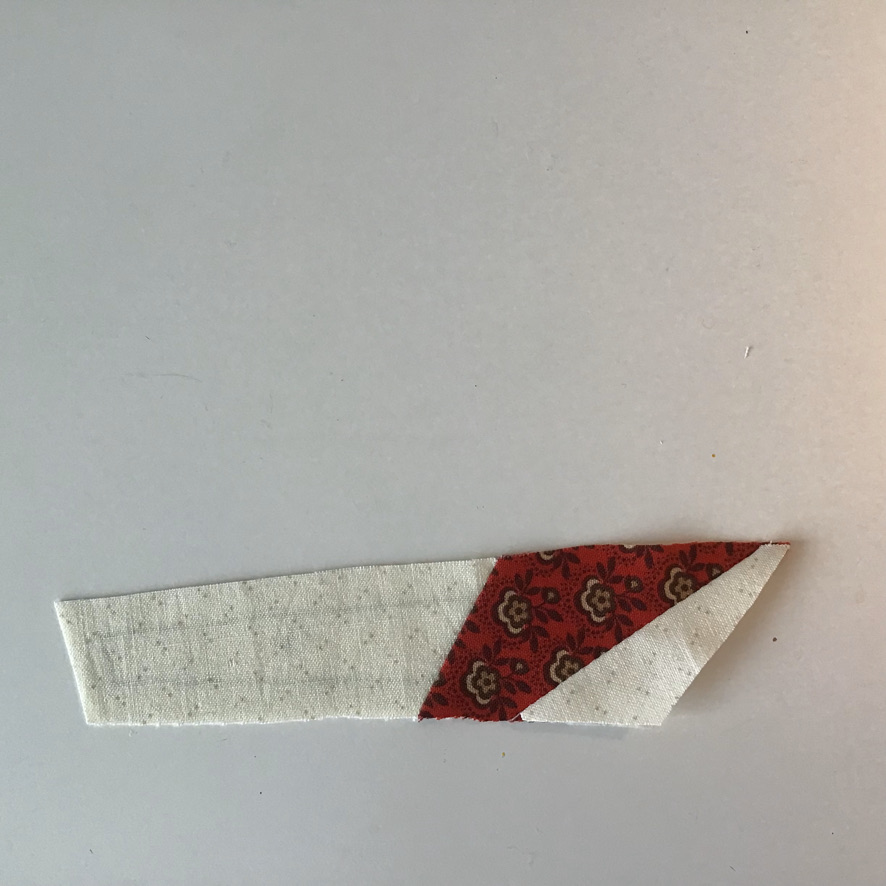
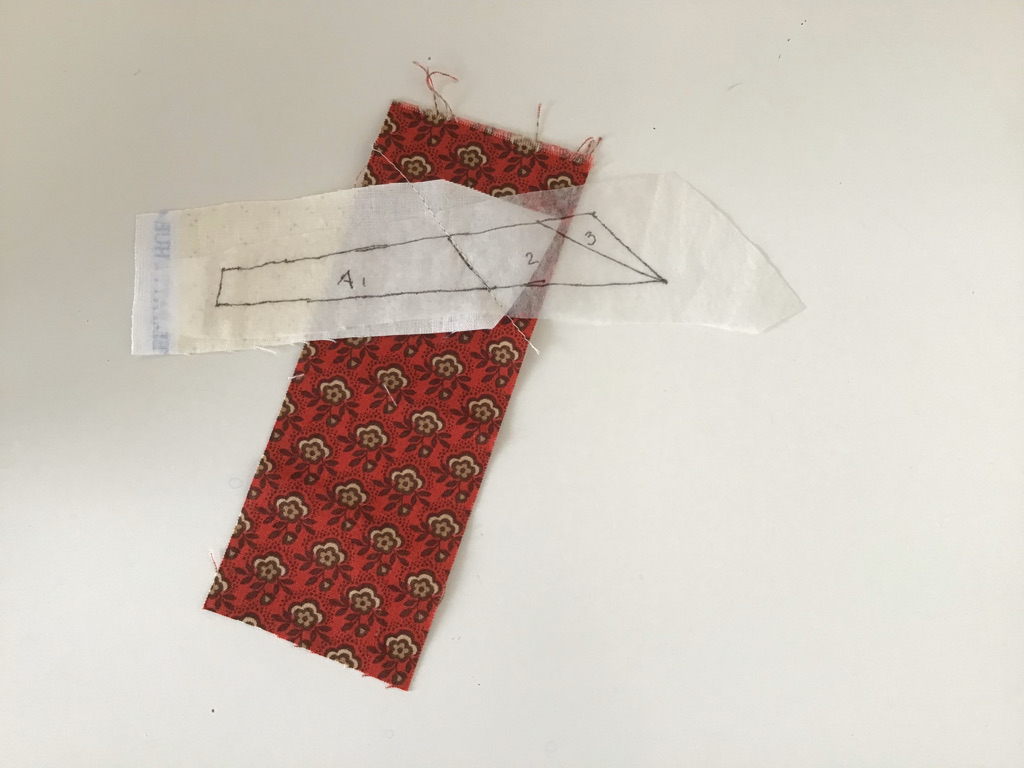 Now the Sewing Work Can Begin. Now the Sewing Work Can Begin.I start with pattern part A, and place pattern part A1, which is the part where template K is pinned, on the fabric. I sew on the back of the fabric, over the lines on the tea bag paper. So, the fabric is placed with the right side down. Make sure the fabric covers the entire piece and that there is enough fabric extending beyond the pattern everywhere. The pieces will need to be sewn together again later, so there should be enough seam allowance left. For me, part A1 is the light cream-colored fabric. Part A2 is the next part, and it should be placed so that when the seam between A1 and A2 is sewn and part A2 is folded back, the entire pattern part A2 is covered. It might sound complicated, but you can see what I mean in the photo. When you sew, you should be able to read the text. If not, then you have your paper piecing part upside down. Remove the fabric pieces and make sure to sew them to the correct side of the paper piecing pattern part. |
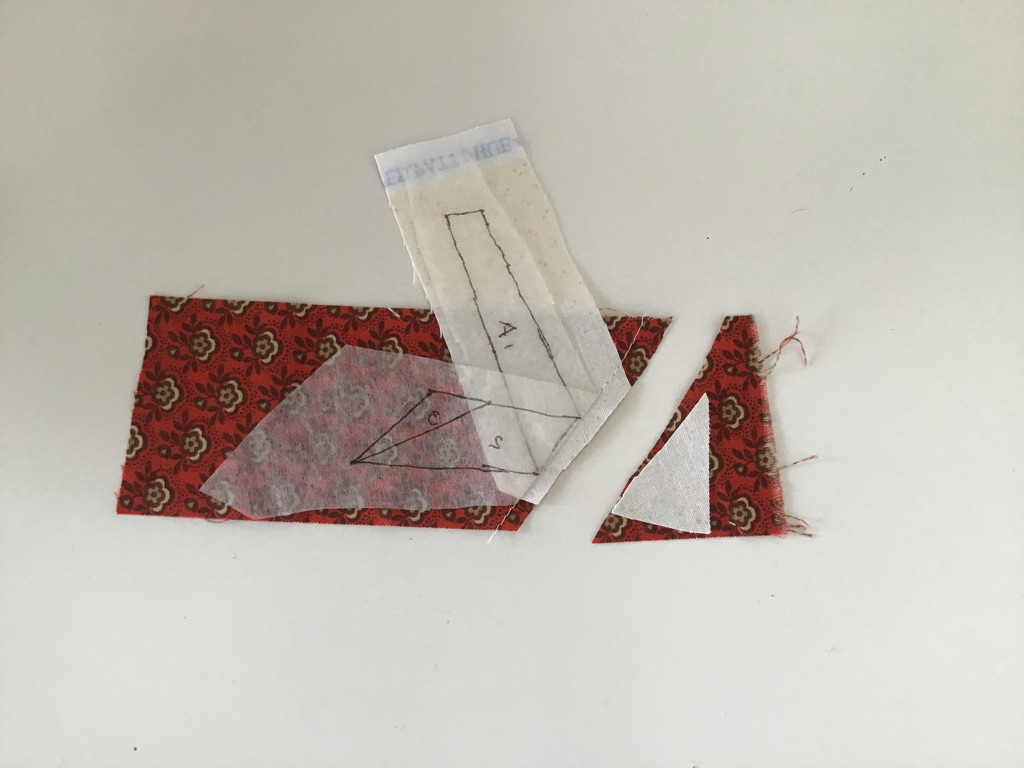 Trim the excess fabric, making sure to leave about a foot wide or 1/4 inch remaining. Be careful not to cut the paper piecing pattern. Trim the excess fabric, making sure to leave about a foot wide or 1/4 inch remaining. Be careful not to cut the paper piecing pattern. |
 Fold the just-sewn part to the right side and press it nice and smooth. You can read the text in the photo next to it, so the fabric is sewn to the correct side of the paper piecing pattern part. Fold the just-sewn part to the right side and press it nice and smooth. You can read the text in the photo next to it, so the fabric is sewn to the correct side of the paper piecing pattern part. |
 You can also trim excess fabric on the sides. Make sure there is a seam allowance of about a foot wide or 1/4 inch all around. You'll need this seam allowance to sew the pieces together. You can also trim excess fabric on the sides. Make sure there is a seam allowance of about a foot wide or 1/4 inch all around. You'll need this seam allowance to sew the pieces together. |
 Continue with part A3 in the same way you did with part A2. Continue with part A3 in the same way you did with part A2. |
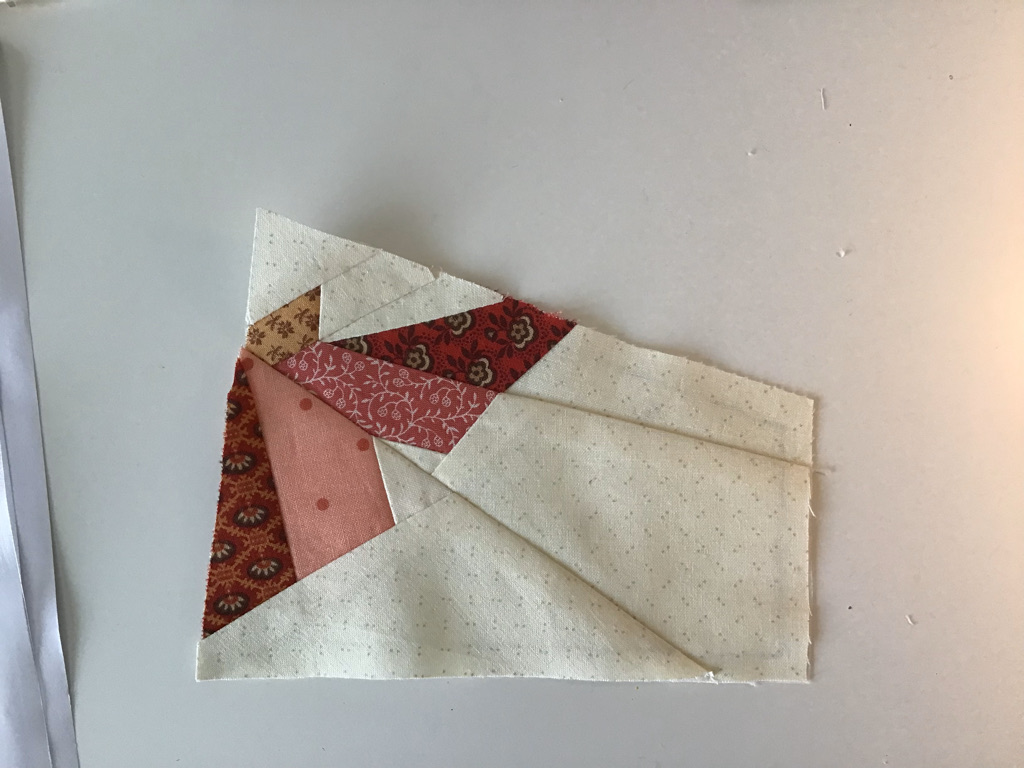 Assemble all paper piecing pattern parts in the same way. If you have multiple parts, you can also assemble them together. Once parts A and B are done, they can be joined. Then part C can be added, and finally, when part D is finished, it can also be added to part ABC. Always check your pattern to see if your parts can really be joined. Assemble all paper piecing pattern parts in the same way. If you have multiple parts, you can also assemble them together. Once parts A and B are done, they can be joined. Then part C can be added, and finally, when part D is finished, it can also be added to part ABC. Always check your pattern to see if your parts can really be joined. |
 I store parts that are sewn together in sleeves, this keeps everything organized and makes it easy to see which parts can already be joined together. I store parts that are sewn together in sleeves, this keeps everything organized and makes it easy to see which parts can already be joined together. |
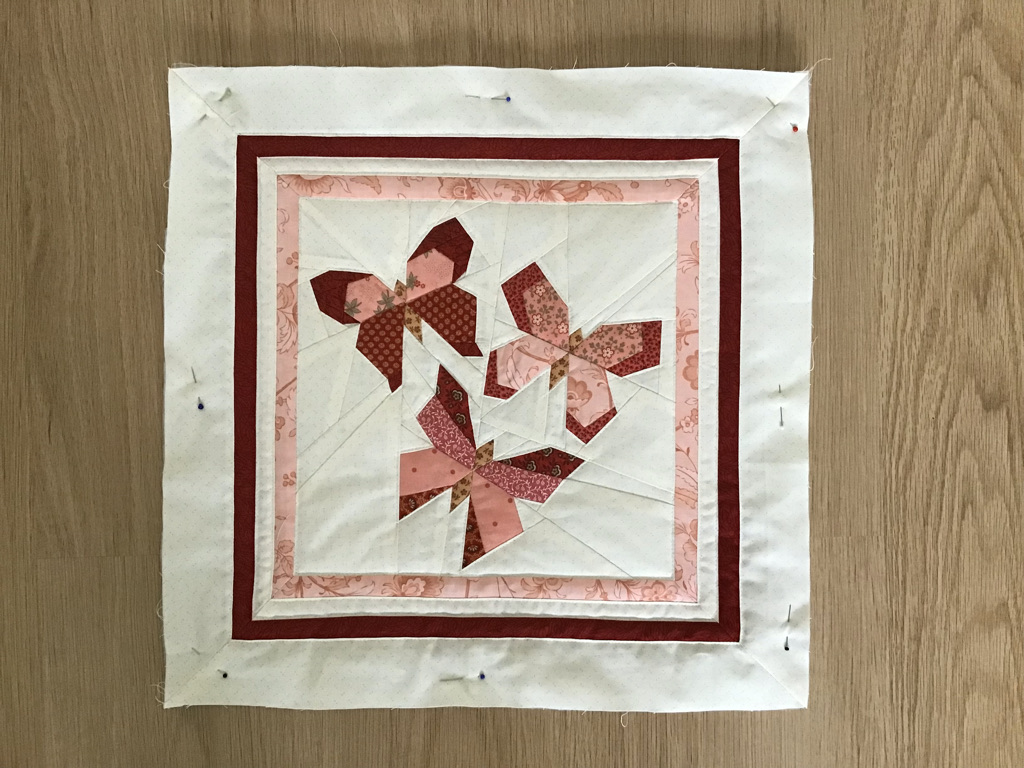
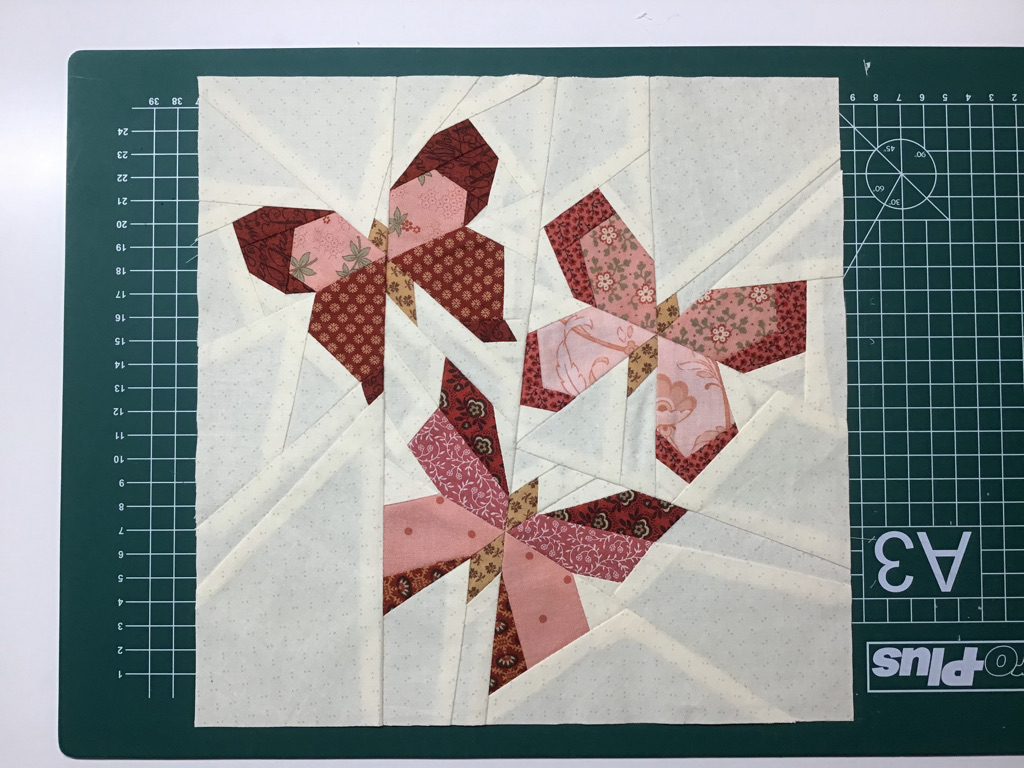 Once you have sewn all the parts together and followed the pattern correctly, you should have a block that is 11 1/2 inches square. If your block is slightly larger or smaller, that's not a problem; you can adjust for that in the outer white border. It's important that your pattern is nice and square. If necessary, trim it slightly with a rotary cutter and a long ruler. Once you have sewn all the parts together and followed the pattern correctly, you should have a block that is 11 1/2 inches square. If your block is slightly larger or smaller, that's not a problem; you can adjust for that in the outer white border. It's important that your pattern is nice and square. If necessary, trim it slightly with a rotary cutter and a long ruler. |
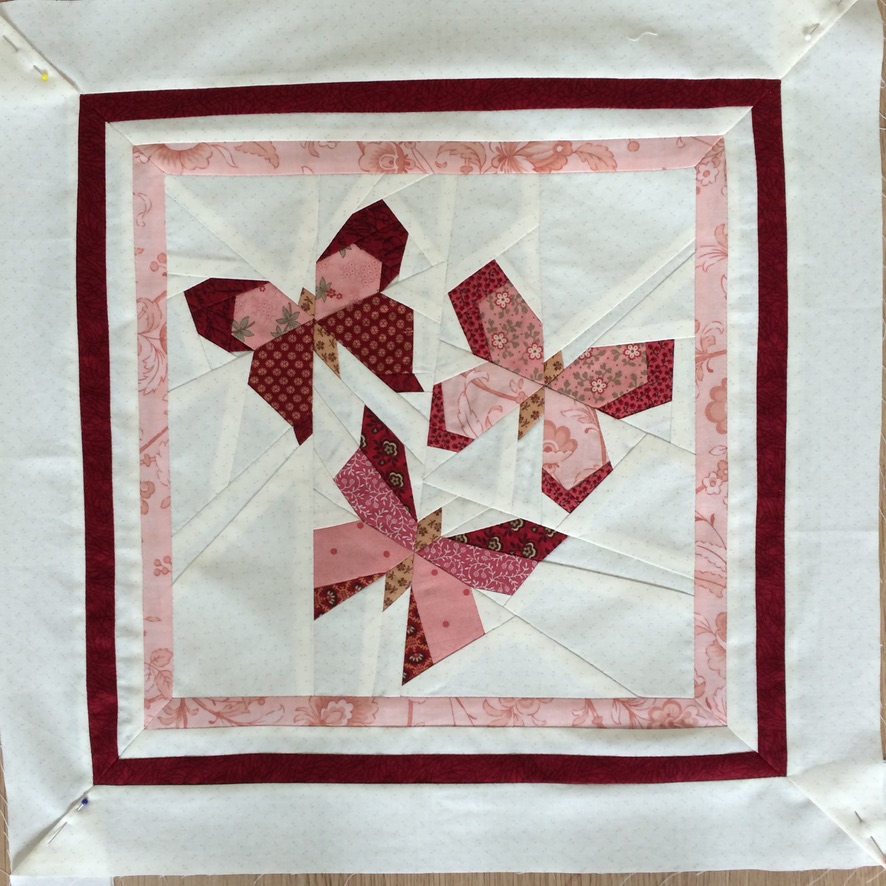 Once the centerpiece is done, you can add the borders. I made diagonal seams, but if you find that too difficult, you can also use borders with straight corners around the centerpiece. The thin borders are 1/2 inch wide. Since you need a 1/4 inch seam allowance on both sides, use 1-inch wide strips for this. The outer border is 1 inch wide, so use 1 1/2 inch wide strips for it. Adjust the width of the outer light border if your center block ended up slightly larger or smaller. Once the centerpiece is done, you can add the borders. I made diagonal seams, but if you find that too difficult, you can also use borders with straight corners around the centerpiece. The thin borders are 1/2 inch wide. Since you need a 1/4 inch seam allowance on both sides, use 1-inch wide strips for this. The outer border is 1 inch wide, so use 1 1/2 inch wide strips for it. Adjust the width of the outer light border if your center block ended up slightly larger or smaller. |
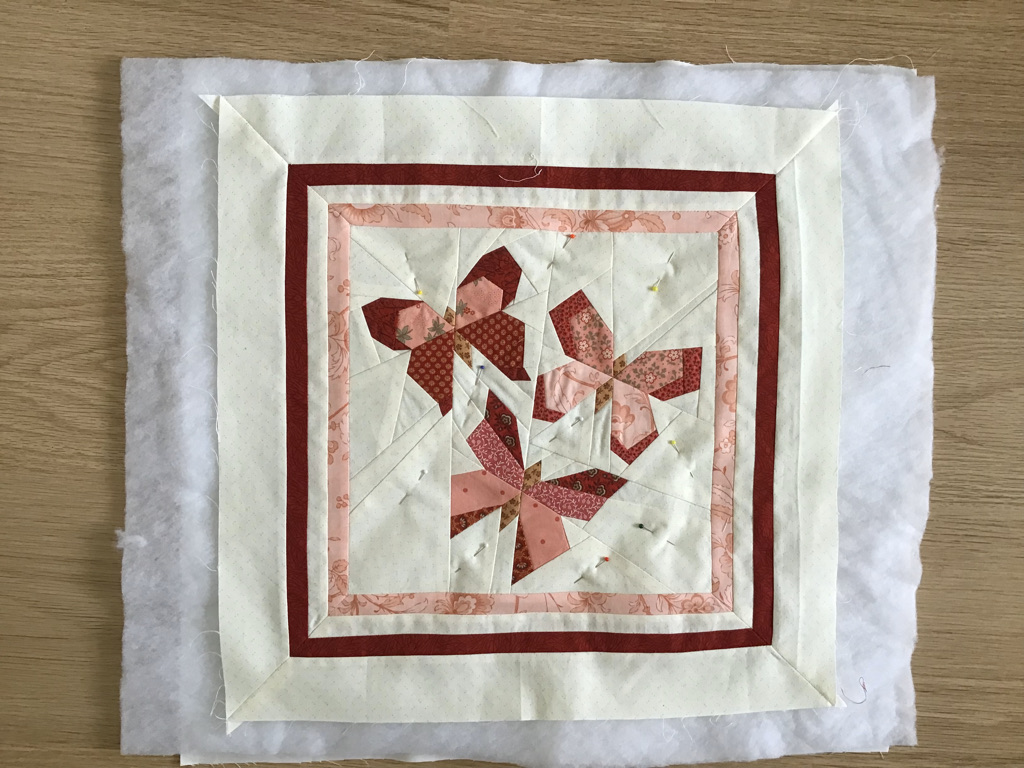 After attaching the borders and trimming the entire block to the correct size, 16 1/2 by 16 1/2 inches, the whole thing can be quilted. I used a plain piece of cotton as the back. The batting is not too thick fiberfill, but other batting materials are also good. Layer the three pieces, with the fiberfill or other batting between the two fabric layers. After attaching the borders and trimming the entire block to the correct size, 16 1/2 by 16 1/2 inches, the whole thing can be quilted. I used a plain piece of cotton as the back. The batting is not too thick fiberfill, but other batting materials are also good. Layer the three pieces, with the fiberfill or other batting between the two fabric layers. |
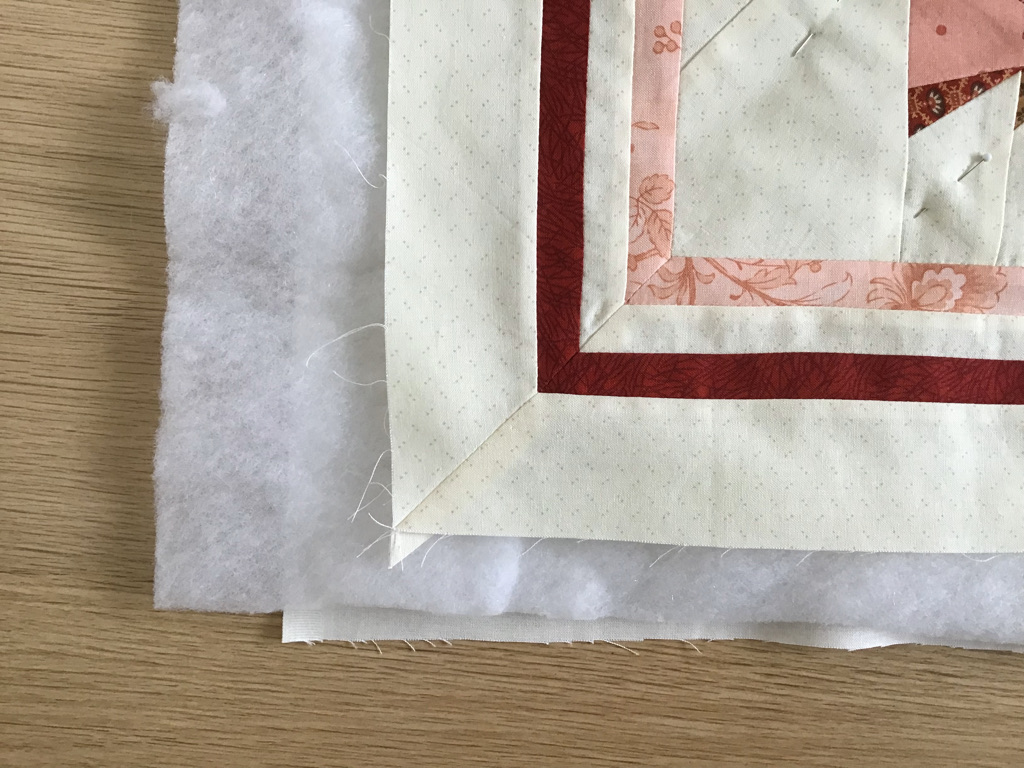 The right sides of the fabric should be on the outside. I have the quilted block on top. The right sides of the fabric should be on the outside. I have the quilted block on top. |
 Before sewing the three layers together, pin them together at several spots. Before sewing the three layers together, pin them together at several spots. |
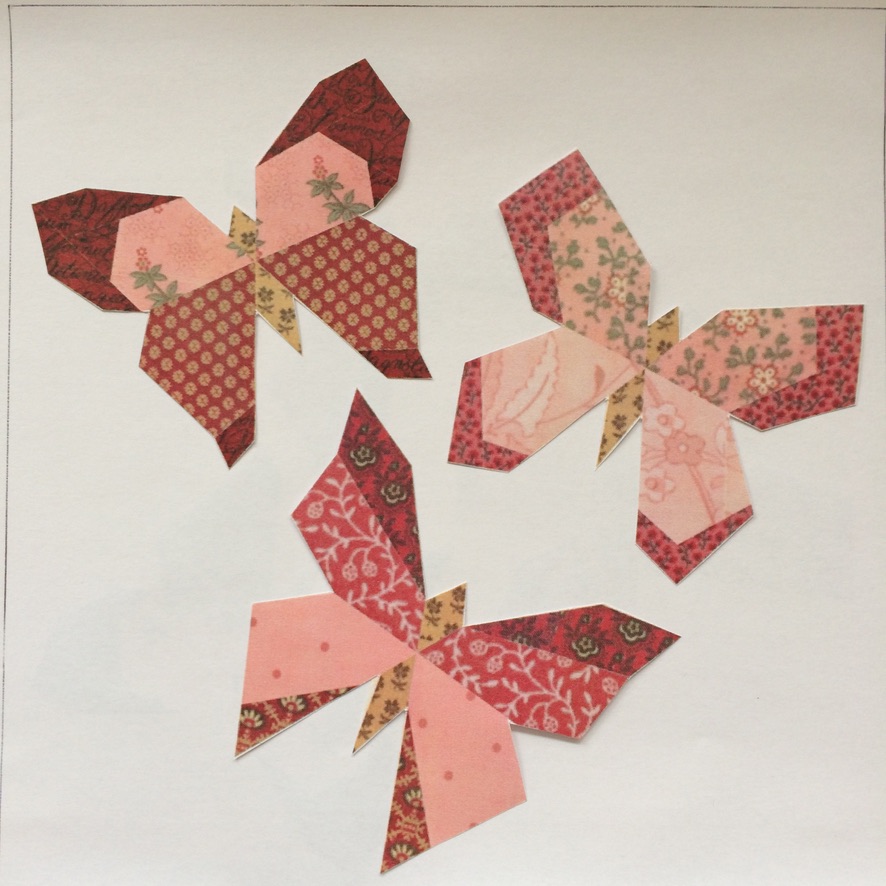
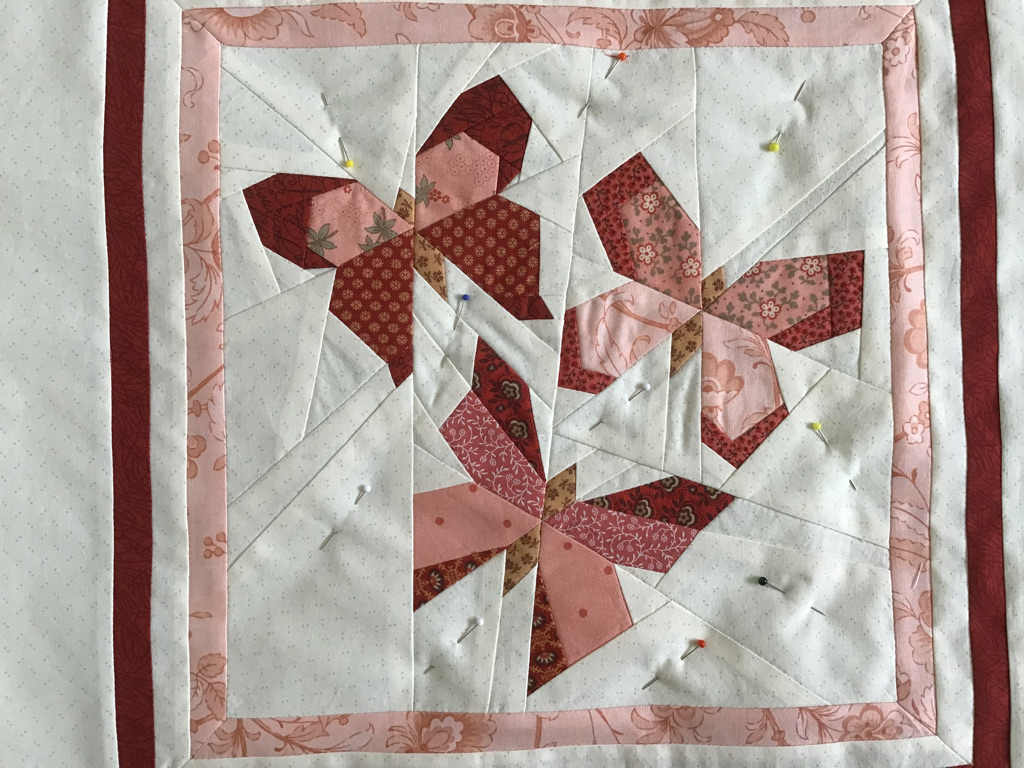
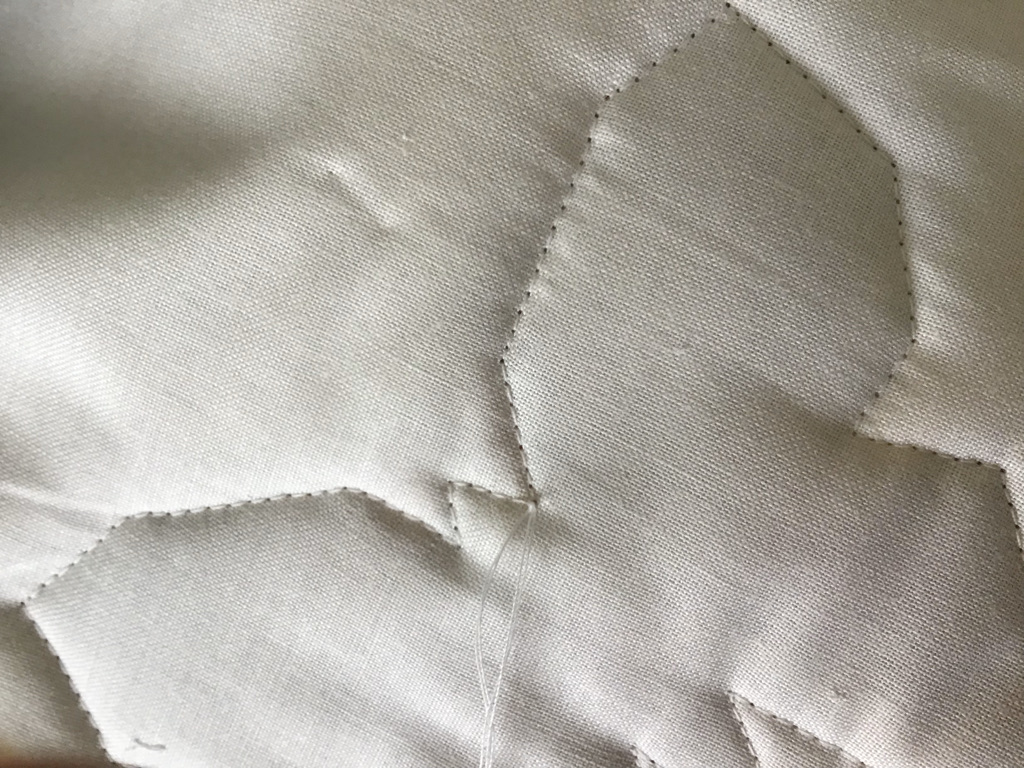 I stitch around the butterfly, which is called contour stitching. I pull the beginning and ending threads to the back. On the back, I tie a small knot and weave the thread ends into the batting. I stitch around the butterfly, which is called contour stitching. I pull the beginning and ending threads to the back. On the back, I tie a small knot and weave the thread ends into the batting. |
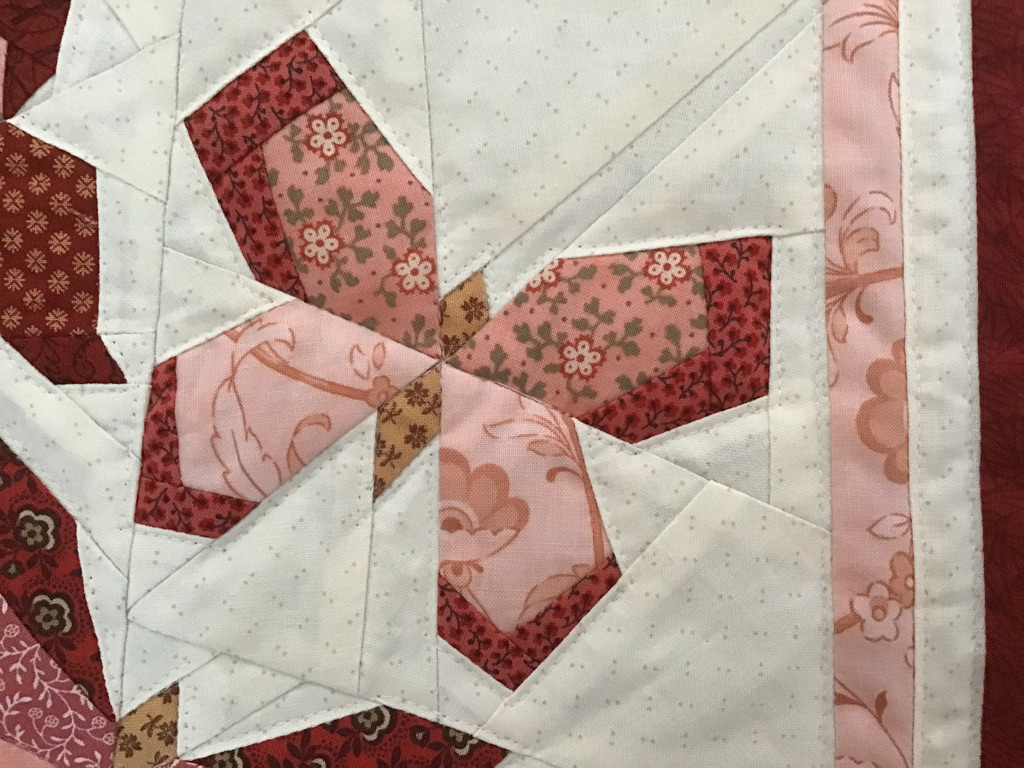 Here you can see that I stitched close around the butterfly. I also stitched the layers together along the colored borders on the light fabric. Here you can see that I stitched close around the butterfly. I also stitched the layers together along the colored borders on the light fabric. |
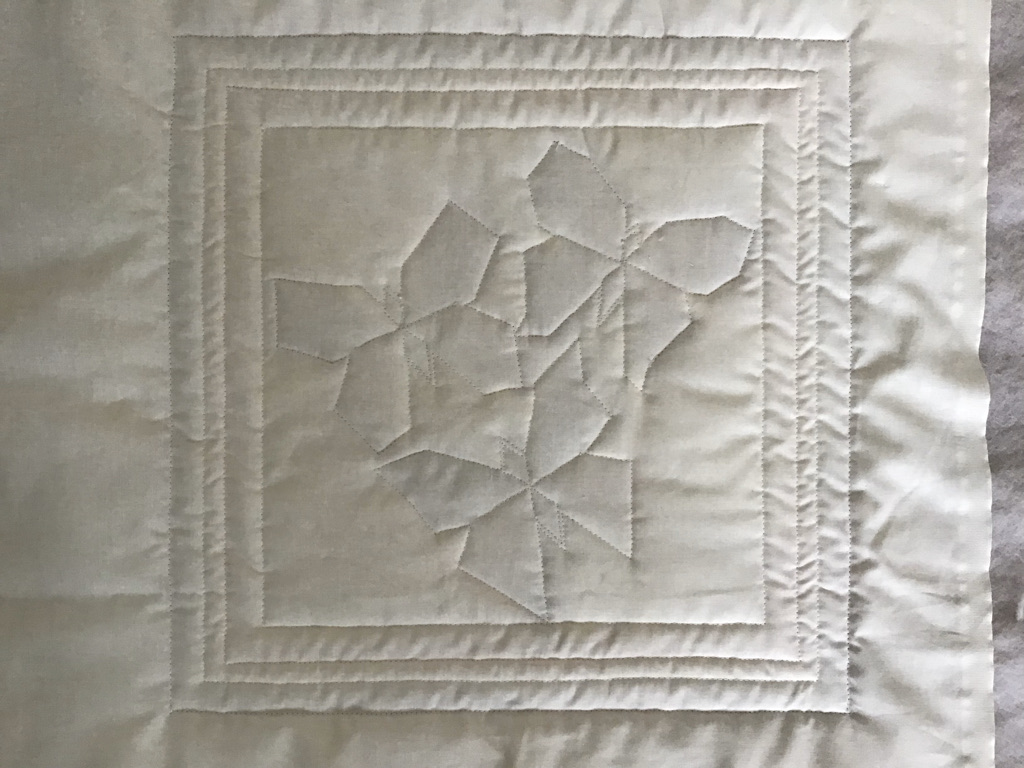 On the back, you can clearly see where the layers are stitched together. You can, of course, do this differently if you prefer. On the back, you can clearly see where the layers are stitched together. You can, of course, do this differently if you prefer. |
 If I'm satisfied with the stitching, I pin the edges of the three layers together again and trim the block to the correct size, 16 1/2 inches or 41 cm. The half inch or 1 cm is the seam allowance. If I'm satisfied with the stitching, I pin the edges of the three layers together again and trim the block to the correct size, 16 1/2 inches or 41 cm. The half inch or 1 cm is the seam allowance. |
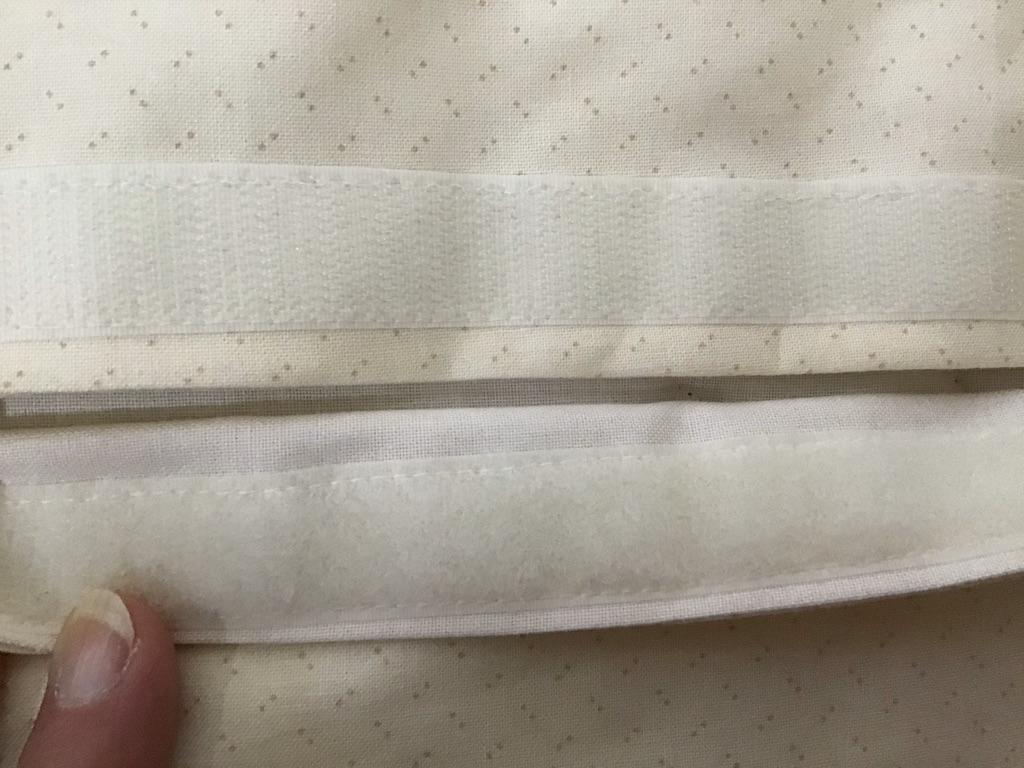 For the back, I take a piece of fabric the same as the light fabric on the front. I cut the fabric into 2 pieces, with one piece slightly larger than the other. I used 2 layers of fabric, but if you don't have this, one layer is enough. I sewed a strip of Velcro to the pieces. For the back, I take a piece of fabric the same as the light fabric on the front. I cut the fabric into 2 pieces, with one piece slightly larger than the other. I used 2 layers of fabric, but if you don't have this, one layer is enough. I sewed a strip of Velcro to the pieces. |
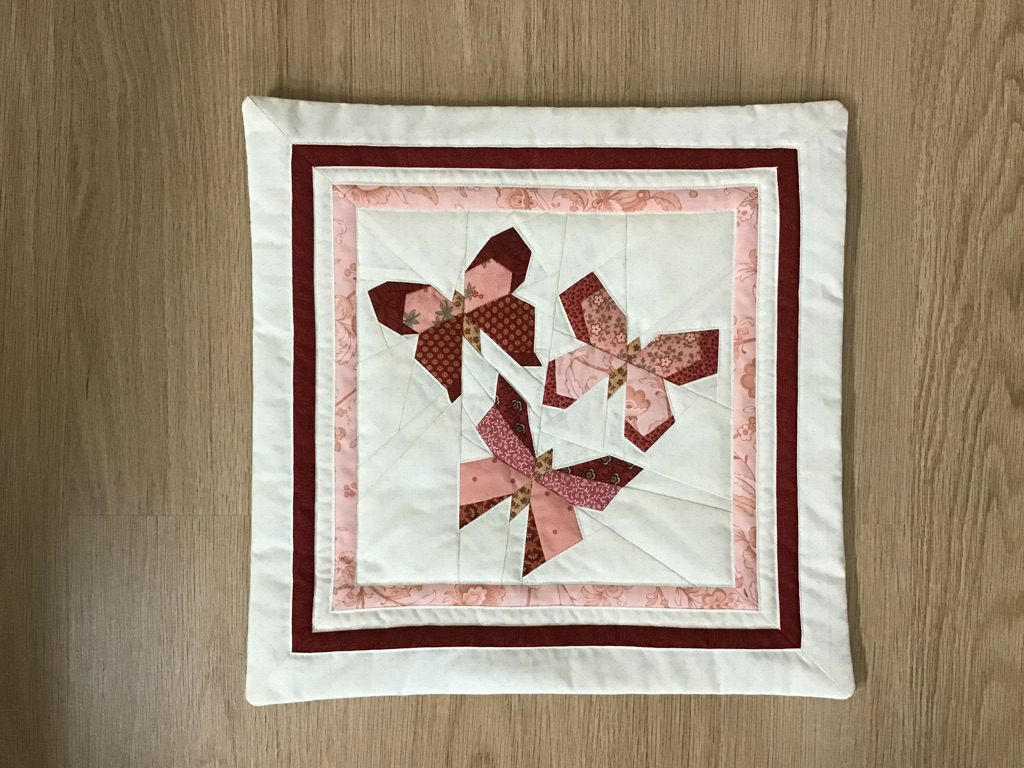 Place the pieces with Velcro on top of each other, then place them on the quilted front with the right sides together. You can now sew around the entire block with a 1/4 inch or 1/5 cm seam allowance. After sewing all around, you can turn your pillow right side out, and it's finished. Place the pieces with Velcro on top of each other, then place them on the quilted front with the right sides together. You can now sew around the entire block with a 1/4 inch or 1/5 cm seam allowance. After sewing all around, you can turn your pillow right side out, and it's finished. |
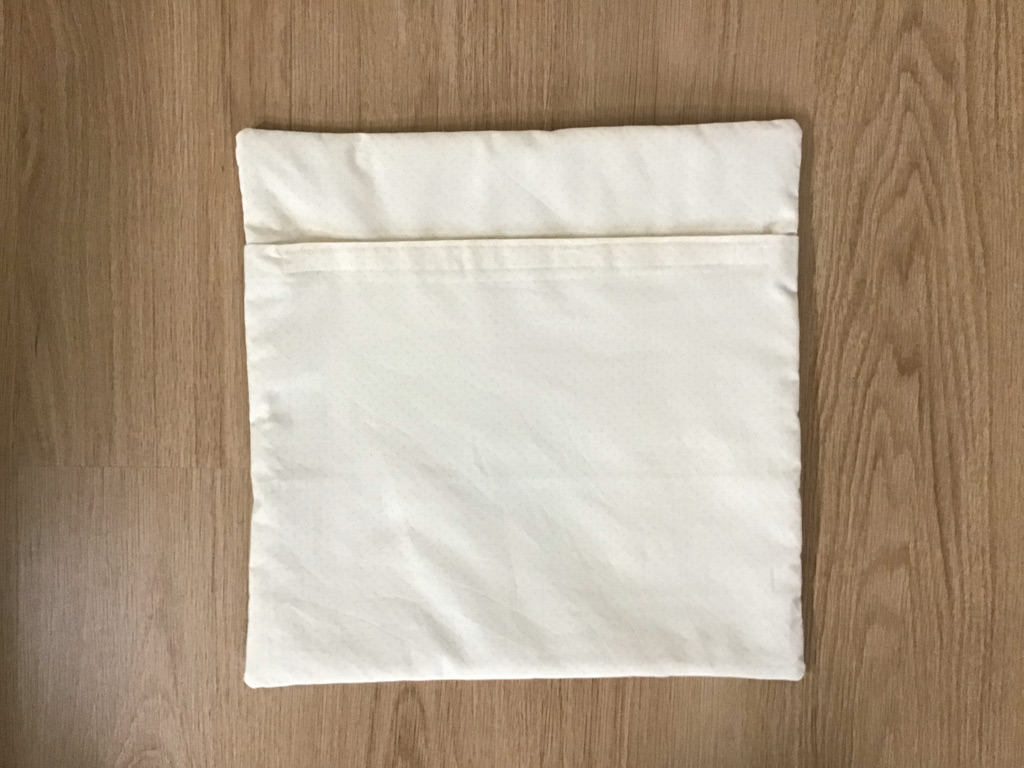 The back can be opened with the Velcro so that a cushion can be inserted. The back can be opened with the Velcro so that a cushion can be inserted. |
| The pillow is now finished. |
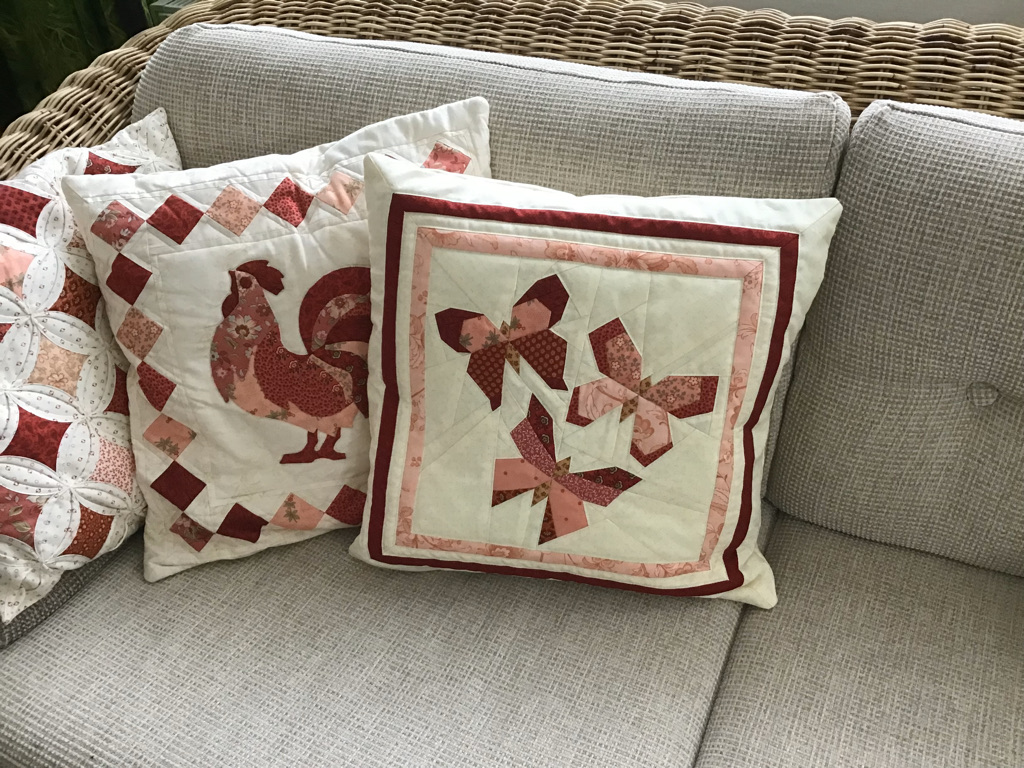 Nice on the couch with the other pillows made from the same fabric scraps. Nice on the couch with the other pillows made from the same fabric scraps. |