
")
")
Page 2 of 4
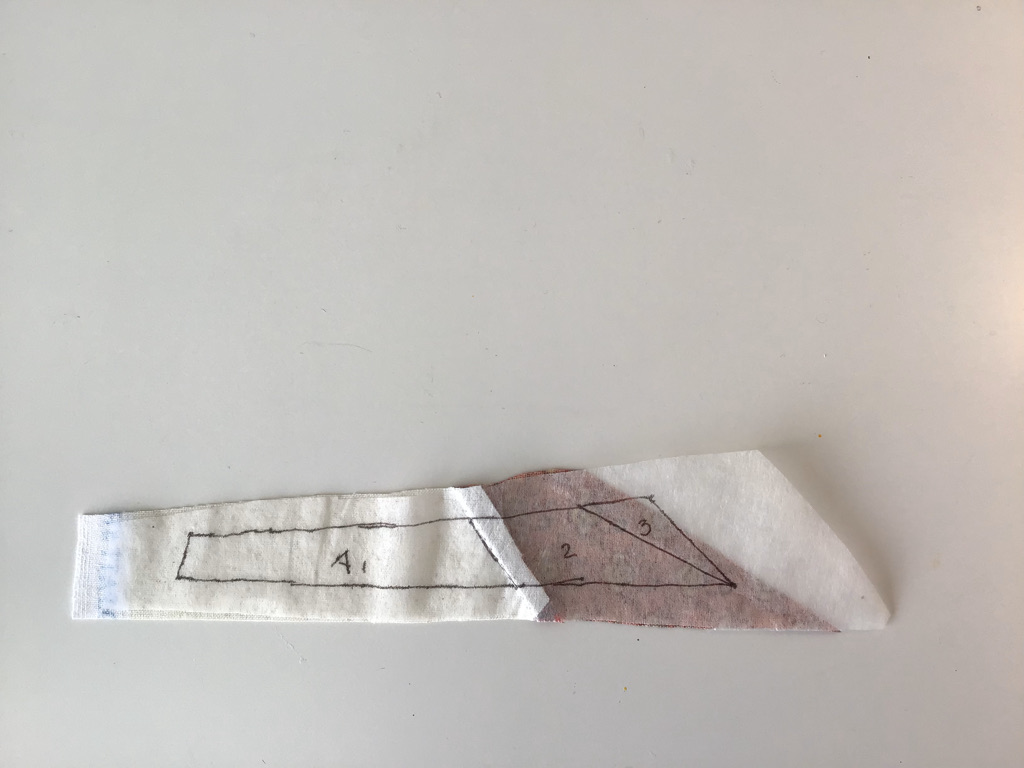
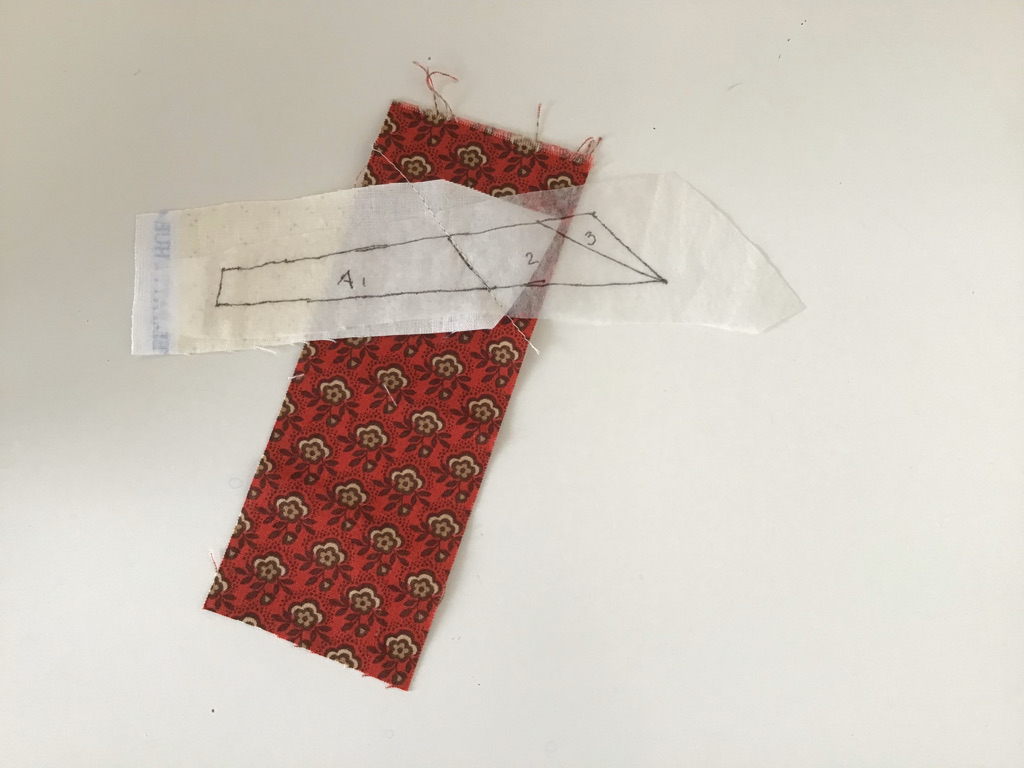 Now the Sewing Work Can Begin. Now the Sewing Work Can Begin.I start with pattern part A, and place pattern part A1, which is the part where template K is pinned, on the fabric. I sew on the back of the fabric, over the lines on the tea bag paper. So, the fabric is placed with the right side down. Make sure the fabric covers the entire piece and that there is enough fabric extending beyond the pattern everywhere. The pieces will need to be sewn together again later, so there should be enough seam allowance left. For me, part A1 is the light cream-colored fabric. Part A2 is the next part, and it should be placed so that when the seam between A1 and A2 is sewn and part A2 is folded back, the entire pattern part A2 is covered. It might sound complicated, but you can see what I mean in the photo. When you sew, you should be able to read the text. If not, then you have your paper piecing part upside down. Remove the fabric pieces and make sure to sew them to the correct side of the paper piecing pattern part. |
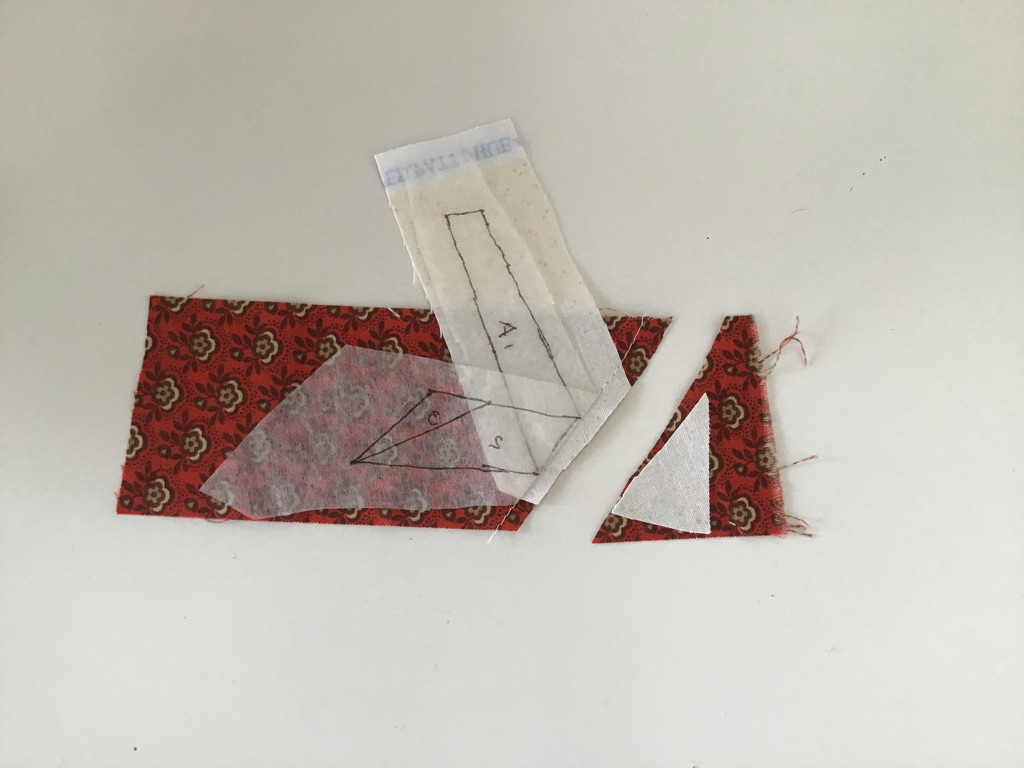 Trim the excess fabric, making sure to leave about a foot wide or 1/4 inch remaining. Be careful not to cut the paper piecing pattern. Trim the excess fabric, making sure to leave about a foot wide or 1/4 inch remaining. Be careful not to cut the paper piecing pattern. |
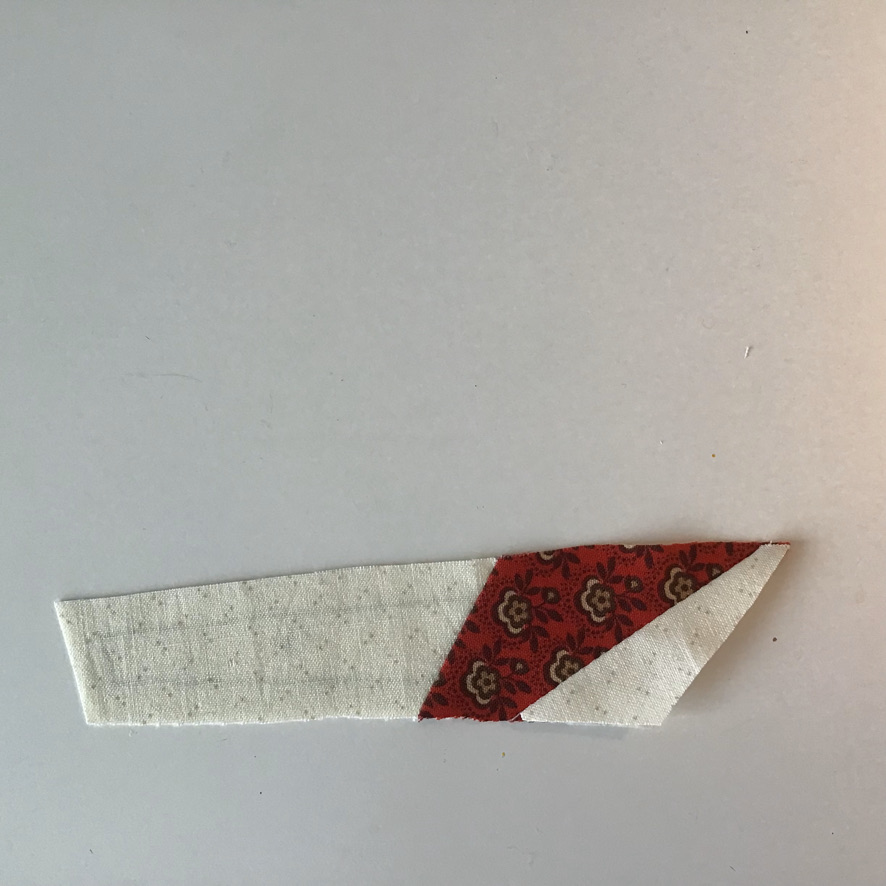
 Fold the just-sewn part to the right side and press it nice and smooth. You can read the text in the photo next to it, so the fabric is sewn to the correct side of the paper piecing pattern part. Fold the just-sewn part to the right side and press it nice and smooth. You can read the text in the photo next to it, so the fabric is sewn to the correct side of the paper piecing pattern part. |
 You can also trim excess fabric on the sides. Make sure there is a seam allowance of about a foot wide or 1/4 inch all around. You'll need this seam allowance to sew the pieces together. You can also trim excess fabric on the sides. Make sure there is a seam allowance of about a foot wide or 1/4 inch all around. You'll need this seam allowance to sew the pieces together. |
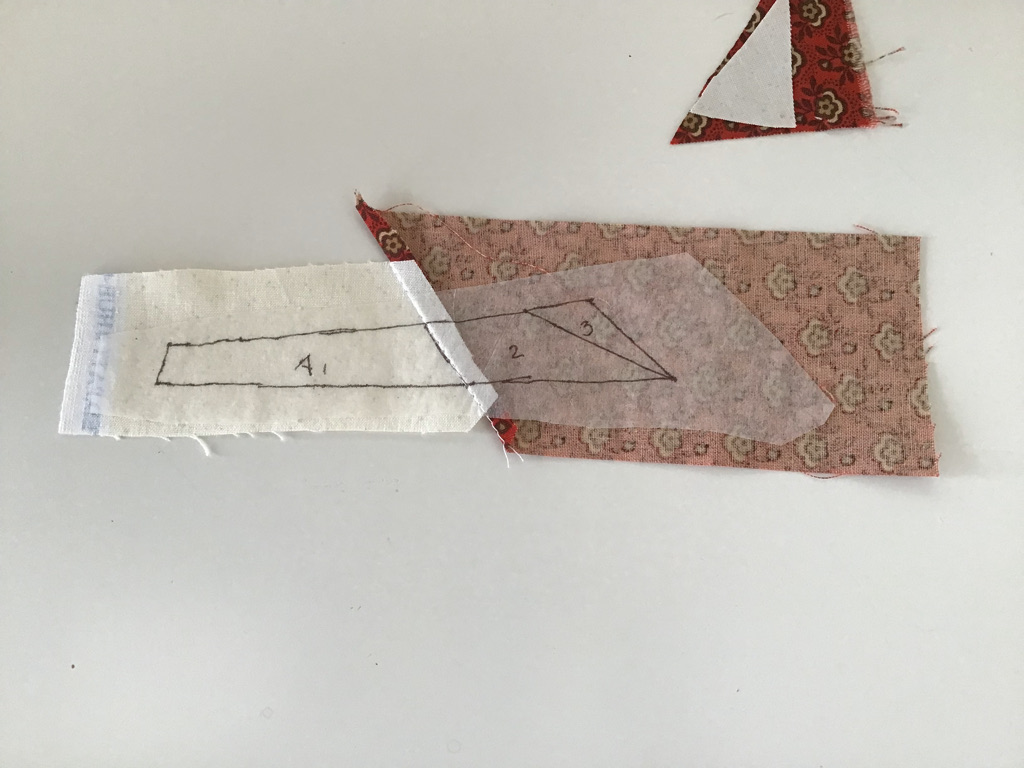
 Continue with part A3 in the same way you did with part A2. Continue with part A3 in the same way you did with part A2. |
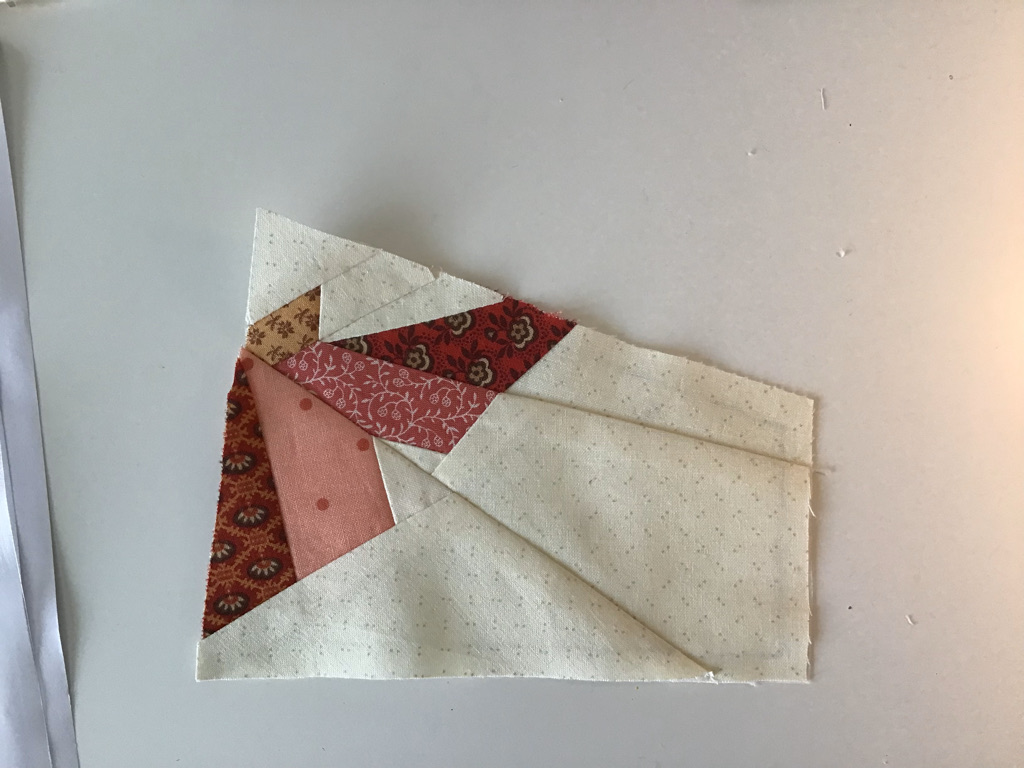 Assemble all paper piecing pattern parts in the same way. If you have multiple parts, you can also assemble them together. Once parts A and B are done, they can be joined. Then part C can be added, and finally, when part D is finished, it can also be added to part ABC. Always check your pattern to see if your parts can really be joined. Assemble all paper piecing pattern parts in the same way. If you have multiple parts, you can also assemble them together. Once parts A and B are done, they can be joined. Then part C can be added, and finally, when part D is finished, it can also be added to part ABC. Always check your pattern to see if your parts can really be joined. |
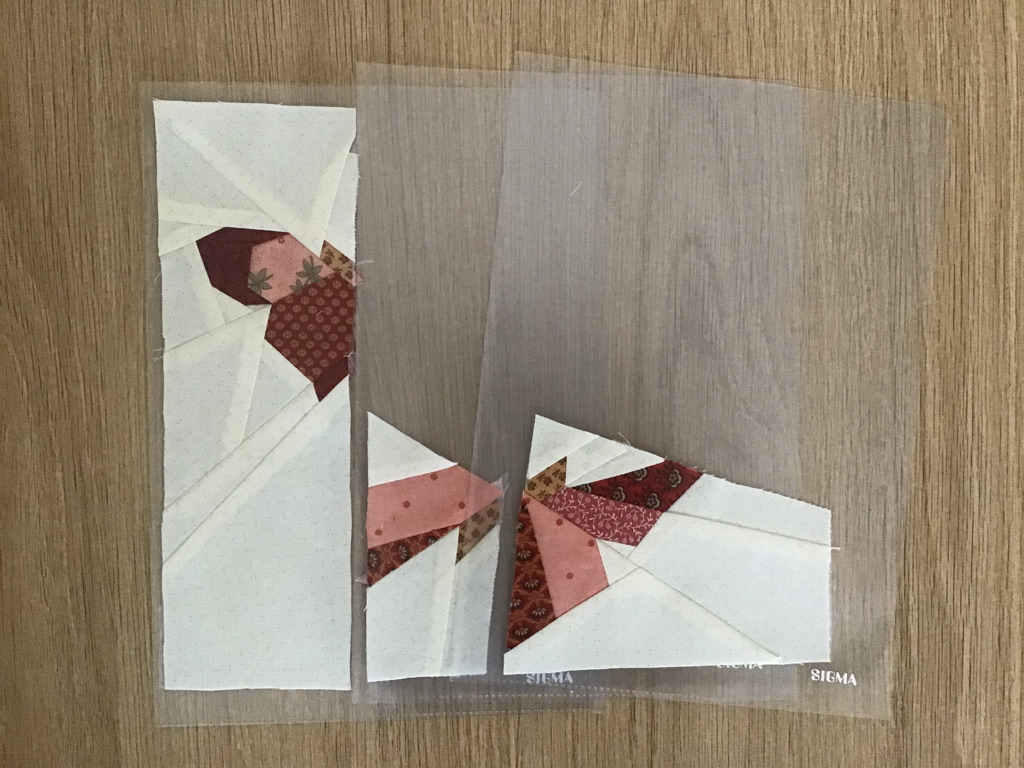 I store parts that are sewn together in sleeves, this keeps everything organized and makes it easy to see which parts can already be joined together. I store parts that are sewn together in sleeves, this keeps everything organized and makes it easy to see which parts can already be joined together. |