
")
")
Page 1 of 4
 Pillows are a beautiful subject to try out a new technique. This is a pillow that utilizes the paper piecing technique. I've already made a few pillows in these warm red tones, so a third one won't hurt. The pillow measures 40x40 cm. For an extensive explanation of paper piecing, you can also view this article. Pillows are a beautiful subject to try out a new technique. This is a pillow that utilizes the paper piecing technique. I've already made a few pillows in these warm red tones, so a third one won't hurt. The pillow measures 40x40 cm. For an extensive explanation of paper piecing, you can also view this article. |
 You can download the pattern of the pillow here. The pattern is a PDF. Before you begin, make sure to check if the squares on the measurement sheet are 1 inch each. If not, adjust your printer settings accordingly. You can download the pattern of the pillow here. The pattern is a PDF. Before you begin, make sure to check if the squares on the measurement sheet are 1 inch each. If not, adjust your printer settings accordingly. |
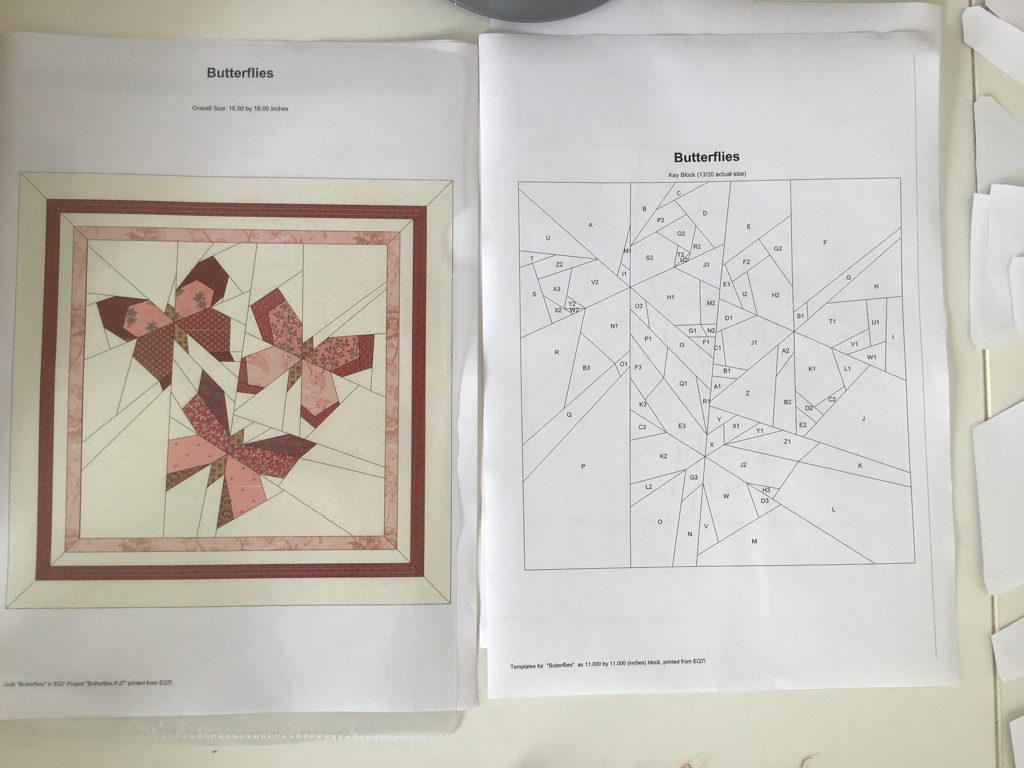 The pattern includes: The pattern includes:
|
 Start by cutting out all the templates (6). Place the templates on the correct fabric and secure them with a single pin. In the overview (5), you can see where each piece belongs in the pattern and choose the correct fabric accordingly. Once you've placed all the pieces on the correct fabric, you can cut them out. Cut the templates generously from the fabric; it doesn't need to be very precise. Start by cutting out all the templates (6). Place the templates on the correct fabric and secure them with a single pin. In the overview (5), you can see where each piece belongs in the pattern and choose the correct fabric accordingly. Once you've placed all the pieces on the correct fabric, you can cut them out. Cut the templates generously from the fabric; it doesn't need to be very precise.Keep in mind to leave enough fabric for the white bias and back of the pattern. The pillow measures 40x40 cm; you'll need 4 white biases of approximately 17 inches in length and 1.5 inches in width, and 4 white biases of approximately 14 inches and 1 inch in width. For the back, you'll need approximately 41 by 60 cm. For the light and dark red biases, you'll need 4 strips of 1 inch in width and a maximum of 16 inches in length each. |
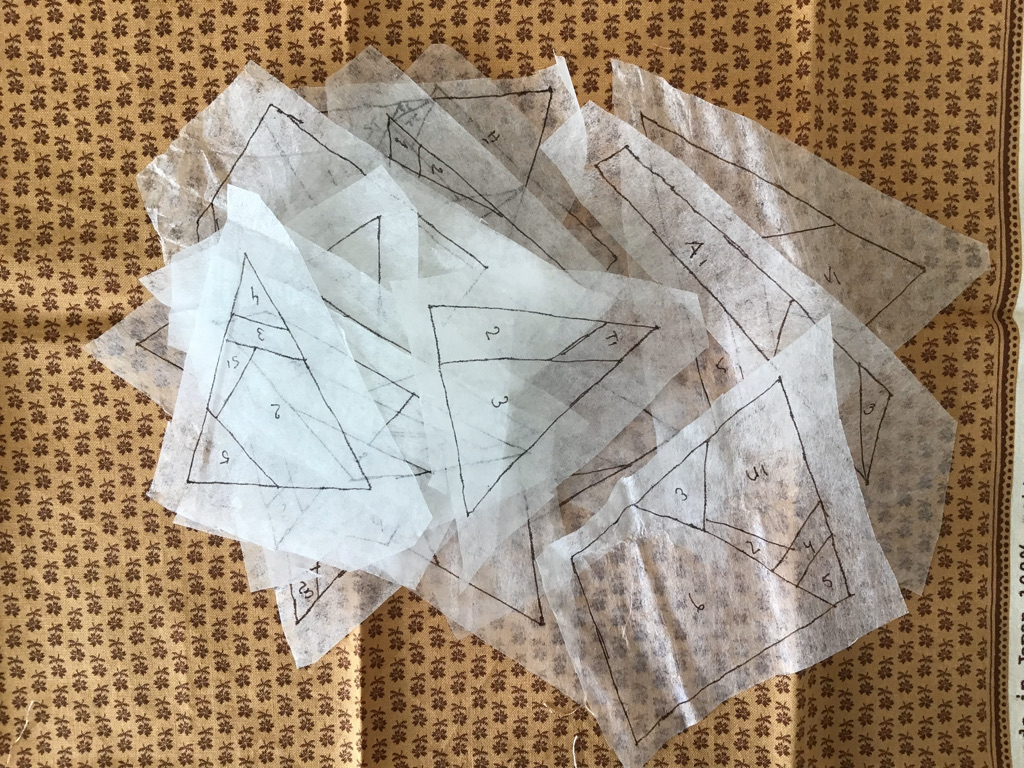 Transfer the paper piecing patterns (4) onto tea bag paper. If you search for tea bag paper online, you'll find various online stores that sell it. The pieces of (4) are already mirrored, so you can place the translucent tea bag paper over the print and trace the pattern with a pencil or thin pen. Make sure to transfer all the text; this prevents you from accidentally sewing on the wrong side and messing up your pattern. I always make sure the patterns are not too close to each other so I can cut them out with some space. Transfer the paper piecing patterns (4) onto tea bag paper. If you search for tea bag paper online, you'll find various online stores that sell it. The pieces of (4) are already mirrored, so you can place the translucent tea bag paper over the print and trace the pattern with a pencil or thin pen. Make sure to transfer all the text; this prevents you from accidentally sewing on the wrong side and messing up your pattern. I always make sure the patterns are not too close to each other so I can cut them out with some space. |
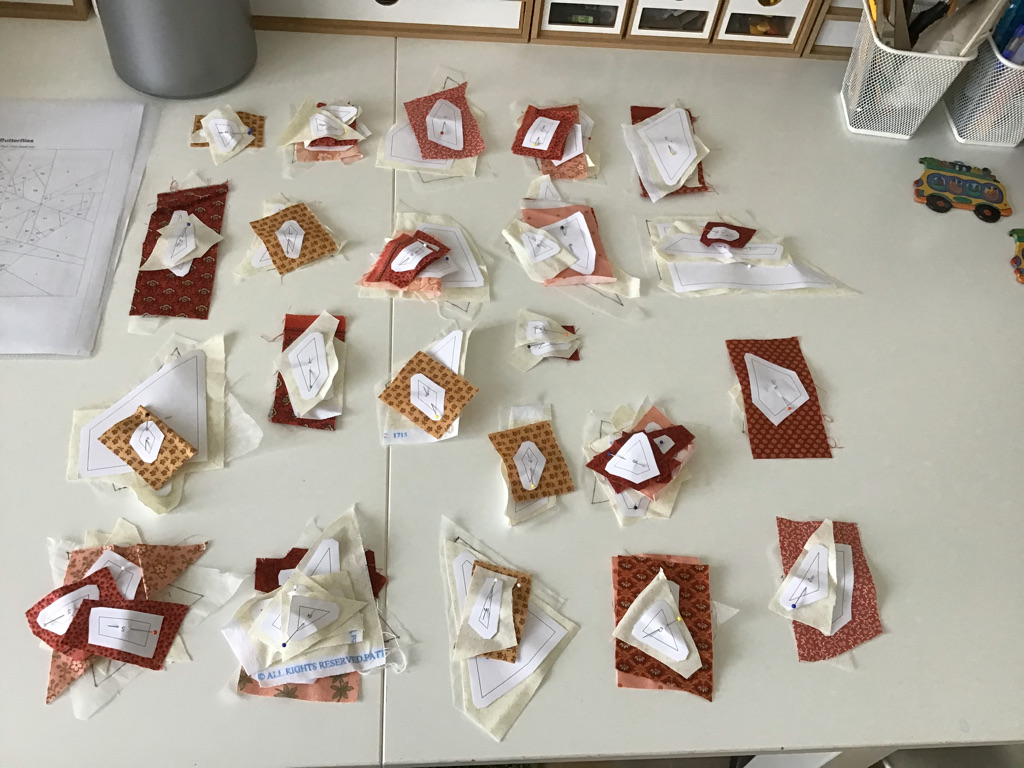 Now, sort all the cut-out templates and paper piecing patterns. Place the corresponding pattern pieces on each paper piecing pattern you've cut from tea bag paper. This prevents you from making mistakes when sewing them together. Now, sort all the cut-out templates and paper piecing patterns. Place the corresponding pattern pieces on each paper piecing pattern you've cut from tea bag paper. This prevents you from making mistakes when sewing them together. |
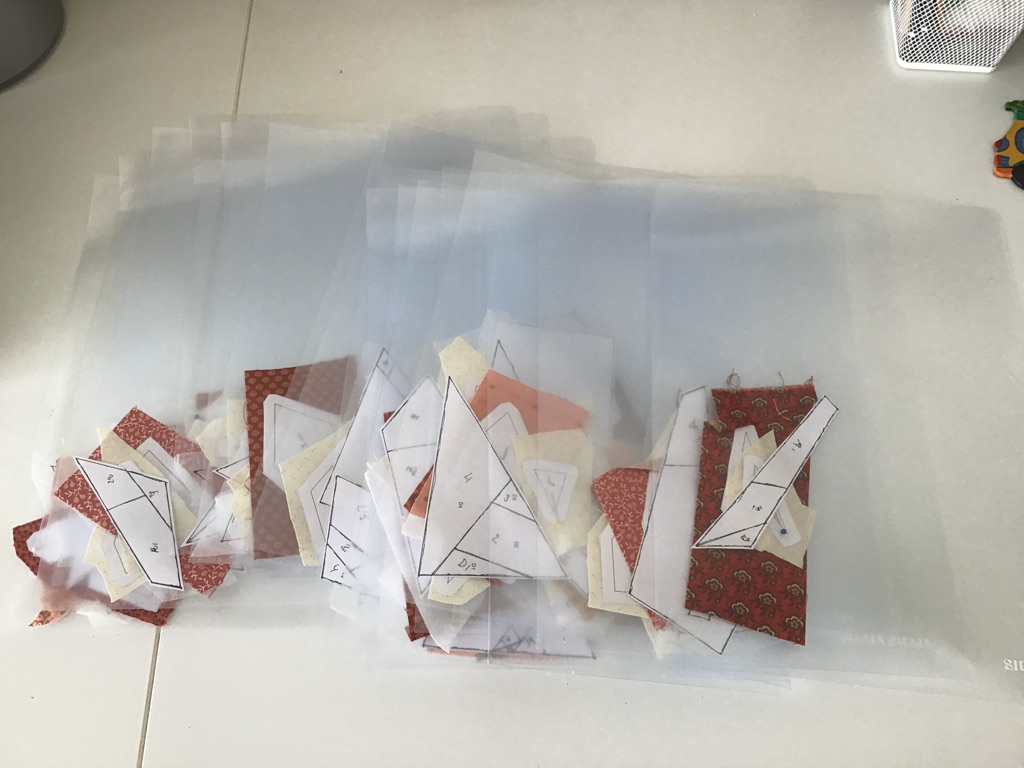 I find it convenient to put each set in a transparent sleeve now. I don't always have time to sew everything together in one go, so this keeps it organized. I sort the sleeves, with paper piecing pattern A in the front and part U, the last part, at the back. All the preparatory work is now done. I find it convenient to put each set in a transparent sleeve now. I don't always have time to sew everything together in one go, so this keeps it organized. I sort the sleeves, with paper piecing pattern A in the front and part U, the last part, at the back. All the preparatory work is now done. |