Page 4 of 4
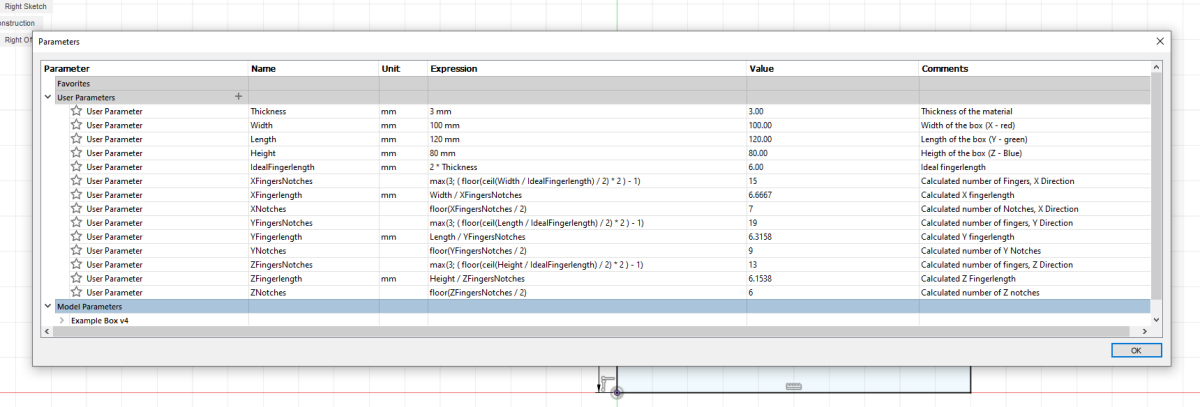 Now that we've finished the bottom plate, let's create notches on the left and right sides of both the front and back. For this, you'll need a few more parameters. Add the following parameters: Now that we've finished the bottom plate, let's create notches on the left and right sides of both the front and back. For this, you'll need a few more parameters. Add the following parameters:ZFingersNotches = max(3; ( floor(ceil(Height / IdealFingerlength) / 2) * 2 ) - 1) ZFingerlength = Height / ZFingersNotches ZNotches = floor(ZFingersNotches / 2) ou should now have the parameters and formulas as shown in the image. |
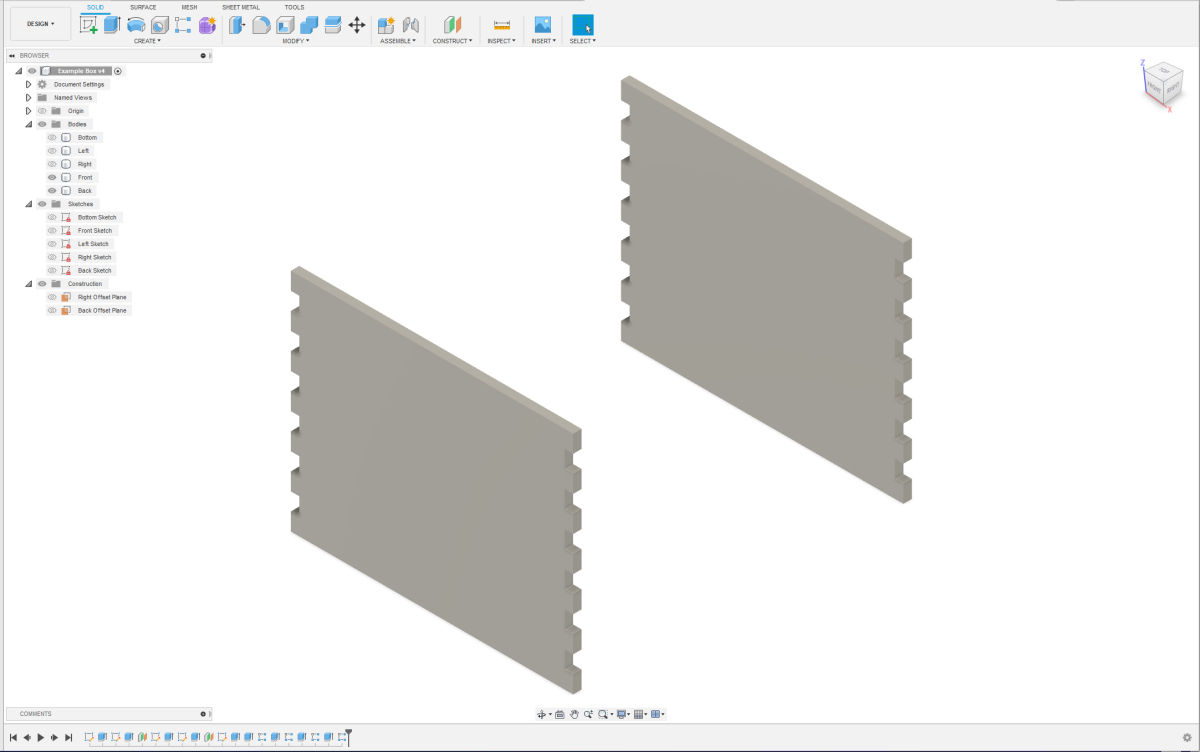 It's possible that when filling in the values for the circular pattern, you may need to swap the values for the first and second directions. Look closely at your image when filling this in, and it should become clear. If everything went well, your front and back should look like the image next to this one. Now it's time for the final steps. It's possible that when filling in the values for the circular pattern, you may need to swap the values for the first and second directions. Look closely at your image when filling this in, and it should become clear. If everything went well, your front and back should look like the image next to this one. Now it's time for the final steps. |
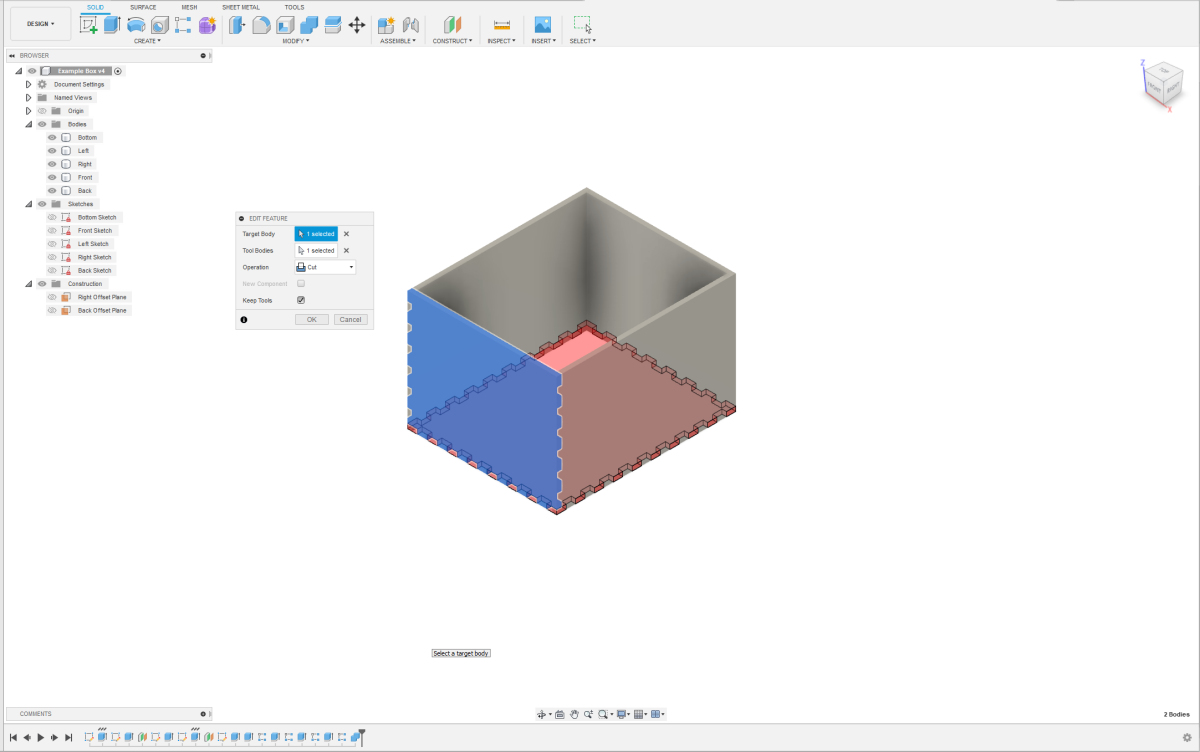 For the final steps, we will use the combine option. By combining a panel that already has notches with an overlapping panel, we will make them fit perfectly and remove any overlap. We start by making notches in the front panel. For the final steps, we will use the combine option. By combining a panel that already has notches with an overlapping panel, we will make them fit perfectly and remove any overlap. We start by making notches in the front panel. Select the Modify Option: - Choose the "Modify" option. - Select the front panel as the target body. - Select the bottom panel as the tool body. Set the Operation: - The operation is set to "Cut" because we are creating holes in the front panel. - We use the shape already in the bottom panel to position these holes exactly. - We still need the bottom panel, the bottom of the box, so check "Keep Tools." Apply the Changes: - Click "OK" to apply the changes. By following these steps, the notches will be created in the front panel, perfectly aligned with the bottom panel. This method ensures a precise fit without any overlaps. |
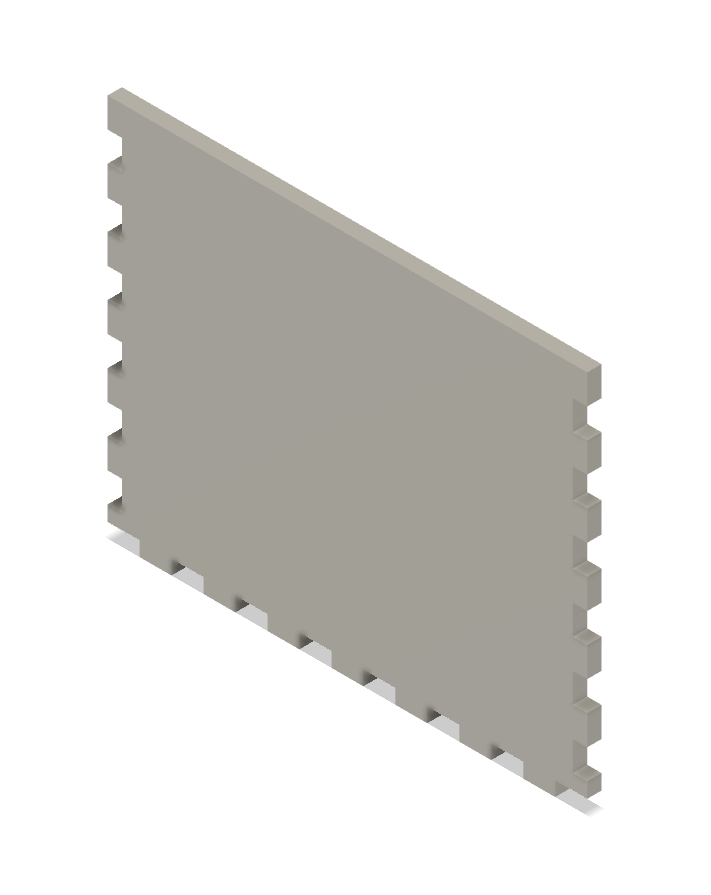 If done correctly, your front panel should now look like the photo shown here. If this is not clearly visible, make the other components invisible. We will use the same method to create fingers and notches in the back panel. If done correctly, your front panel should now look like the photo shown here. If this is not clearly visible, make the other components invisible. We will use the same method to create fingers and notches in the back panel. |
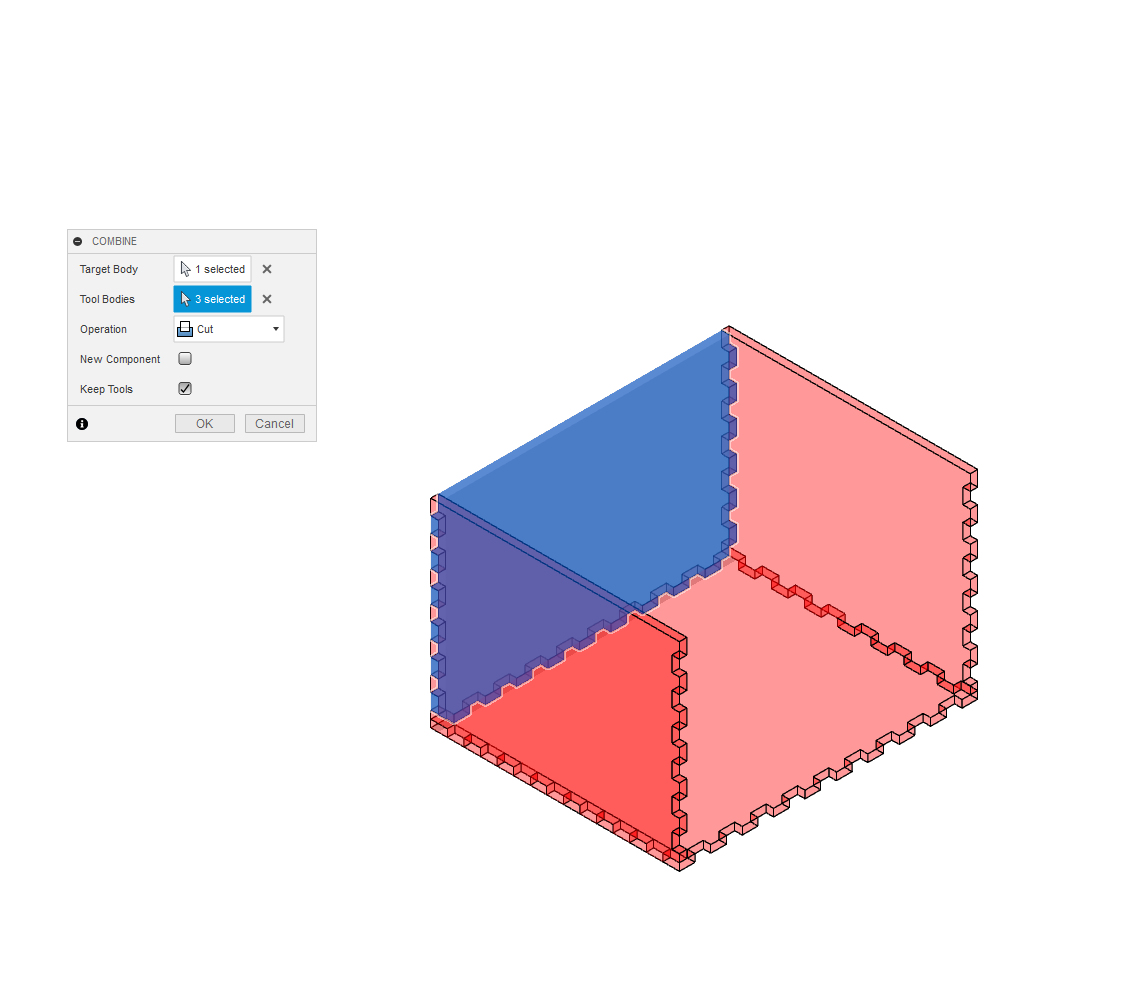 Now the bottom, front, and back are complete. We only need to add notches and fingers to both sides. This process is similar to the previous steps. However, we will now take advantage of the ability to select multiple tool bodies at once. For the left side, select bottom, front, and back as tool bodies. The rest of the options remain the same. Now the bottom, front, and back are complete. We only need to add notches and fingers to both sides. This process is similar to the previous steps. However, we will now take advantage of the ability to select multiple tool bodies at once. For the left side, select bottom, front, and back as tool bodies. The rest of the options remain the same. |
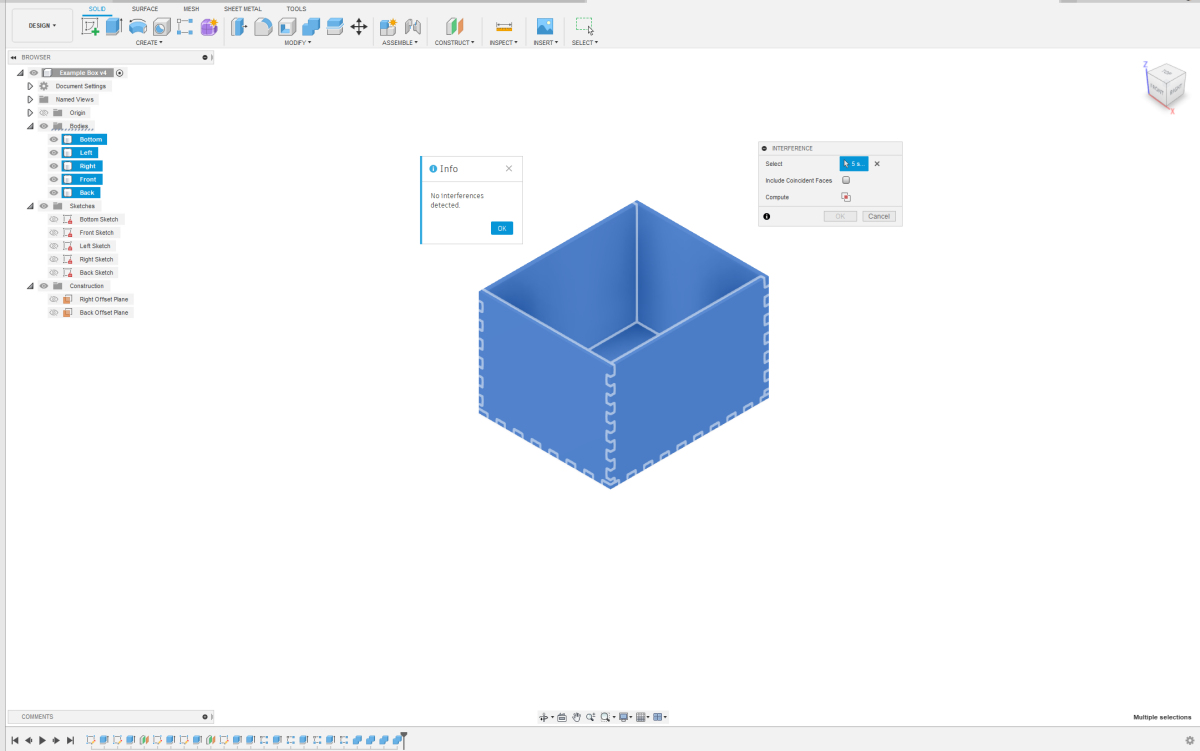 We apply the same trick for the right side. If we check for interference again, we will see that there are no more overlaps in our design. We now have a basic box with finger joints. You can export this design as a .DXF file with kerf compensation. Afterwards, you can edit it in a software package like CorelDRAW, Illustrator, or Inkscape to add engravings, for example. You can read about how to apply kerf compensation in another article. We apply the same trick for the right side. If we check for interference again, we will see that there are no more overlaps in our design. We now have a basic box with finger joints. You can export this design as a .DXF file with kerf compensation. Afterwards, you can edit it in a software package like CorelDRAW, Illustrator, or Inkscape to add engravings, for example. You can read about how to apply kerf compensation in another article. |
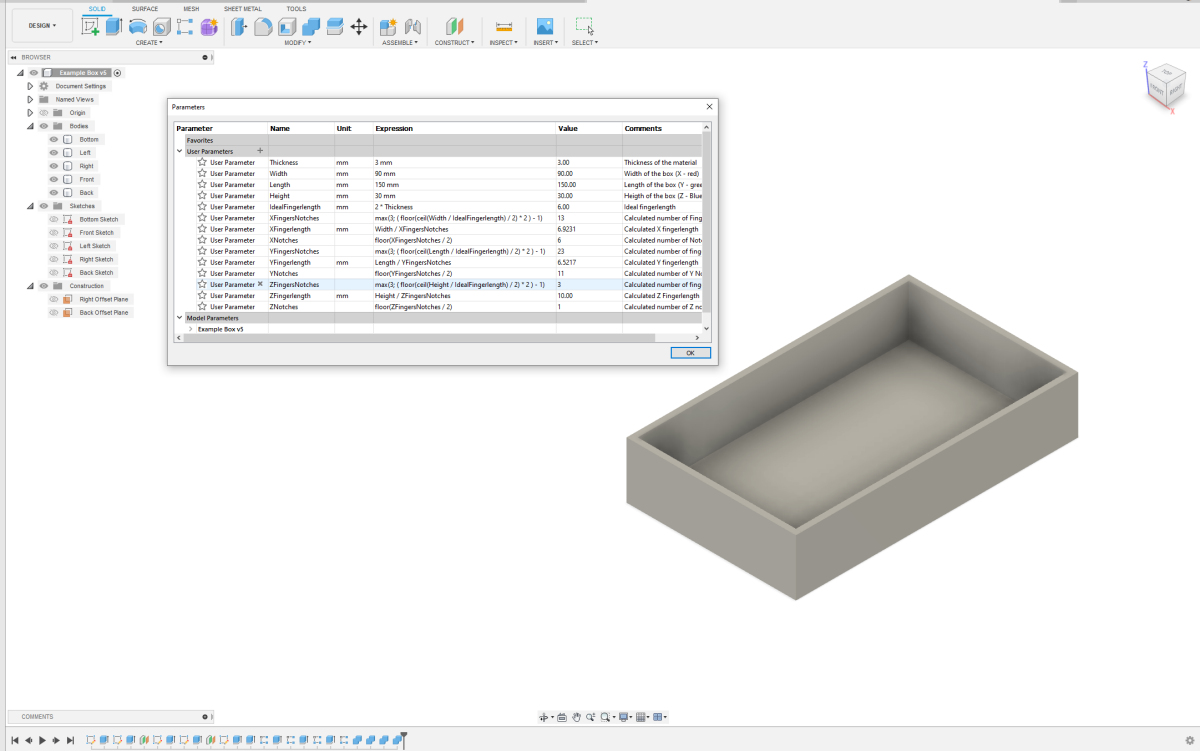 If you want to use this basic box for something else but the dimensions are not right, you can easily adjust this in the parameters. Fusion will recalculate everything for you. It's very handy to have such a standard box design. If you want to use this basic box for something else but the dimensions are not right, you can easily adjust this in the parameters. Fusion will recalculate everything for you. It's very handy to have such a standard box design. |
