
")
")
Page 2 of 4
 To design such a simple box, we could make a copy of the body on the left side and use it. However, for this guide, we will give each side its own sketch. To create the right side, we need to construct an offset plane. You can find offset planes under the "Construct" option in the menu at the top. Select the sketch of the left side for the plane, ensure that "Extent" is set to "Distance", and input the "Width" as the distance. To design such a simple box, we could make a copy of the body on the left side and use it. However, for this guide, we will give each side its own sketch. To create the right side, we need to construct an offset plane. You can find offset planes under the "Construct" option in the menu at the top. Select the sketch of the left side for the plane, ensure that "Extent" is set to "Distance", and input the "Width" as the distance. |
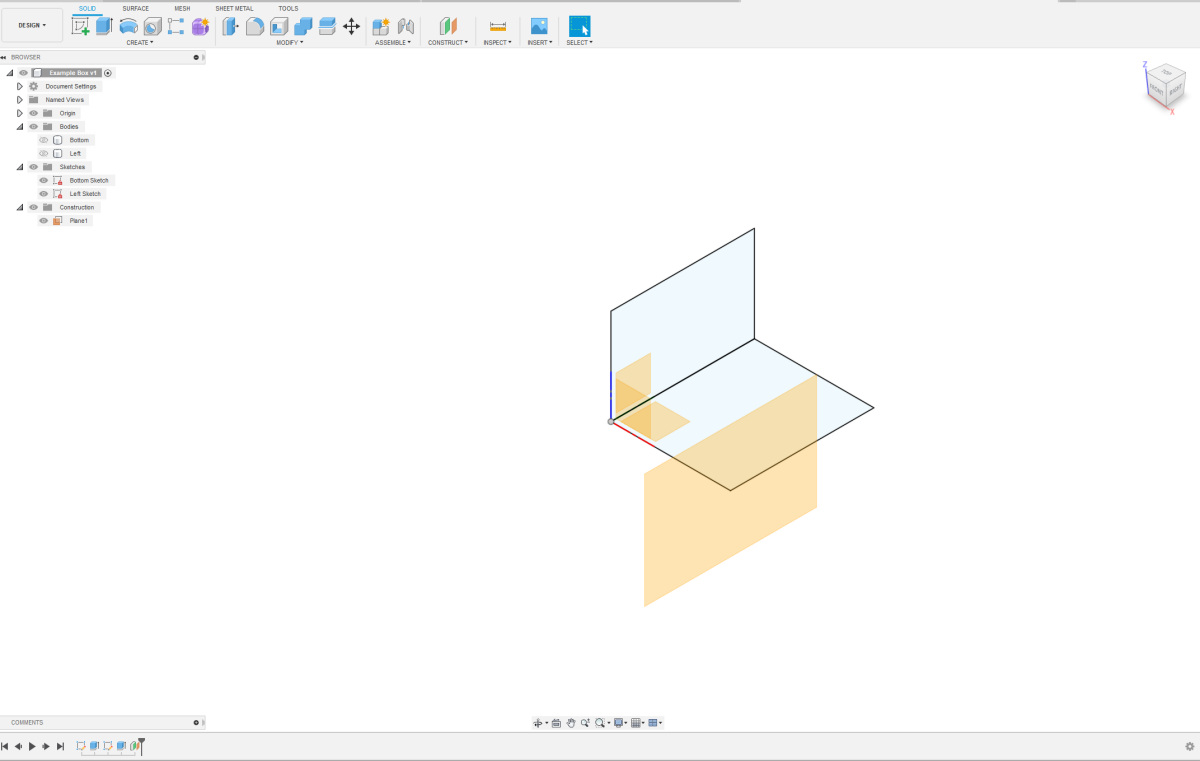 After clicking "OK," the layout may appear a bit odd, but don't worry, we'll fix it. Give your offset plane a logical name, then right-click on it and choose the option "Create Sketch." After clicking "OK," the layout may appear a bit odd, but don't worry, we'll fix it. Give your offset plane a logical name, then right-click on it and choose the option "Create Sketch." |
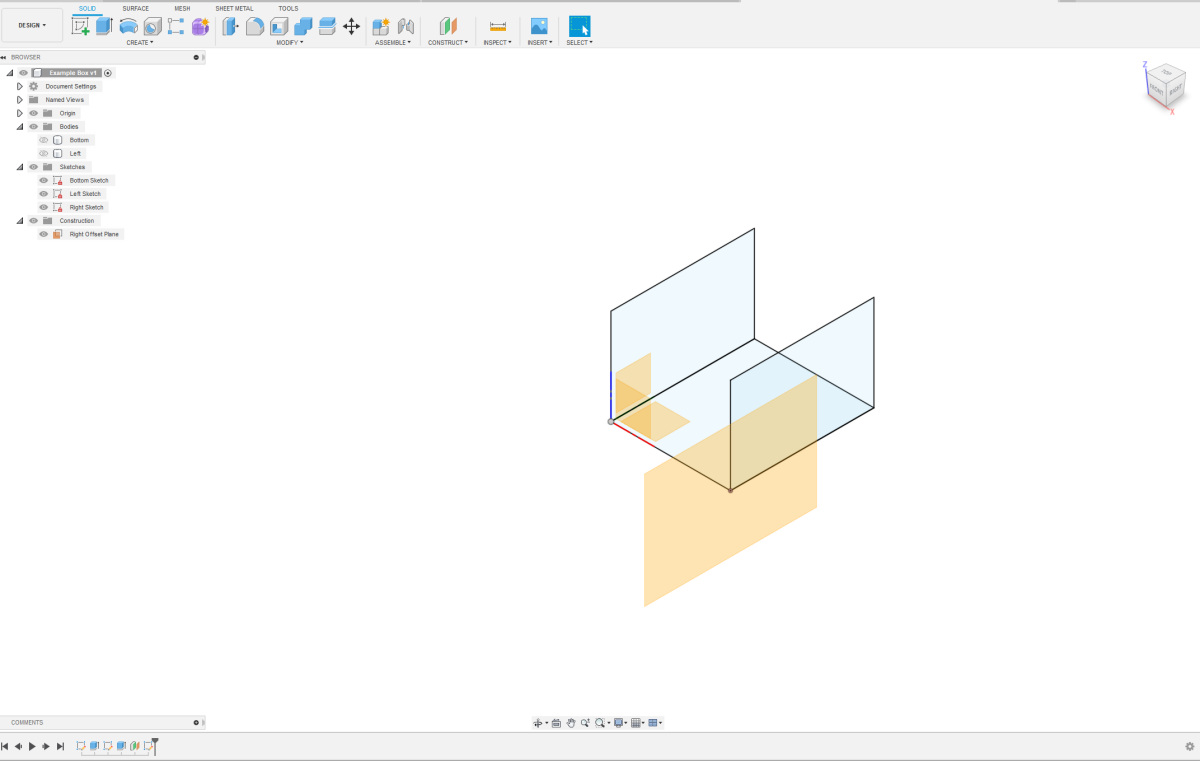 In the sketch, draw another rectangle. For the sides, use the parameters again (Height for the height and Length for the horizontal length). Connect the bottom-left corner using a Coincident Constraint to the bottom-left corner of the existing sketches. Give your sketch a logical name again. In the sketch, draw another rectangle. For the sides, use the parameters again (Height for the height and Length for the horizontal length). Connect the bottom-left corner using a Coincident Constraint to the bottom-left corner of the existing sketches. Give your sketch a logical name again. |
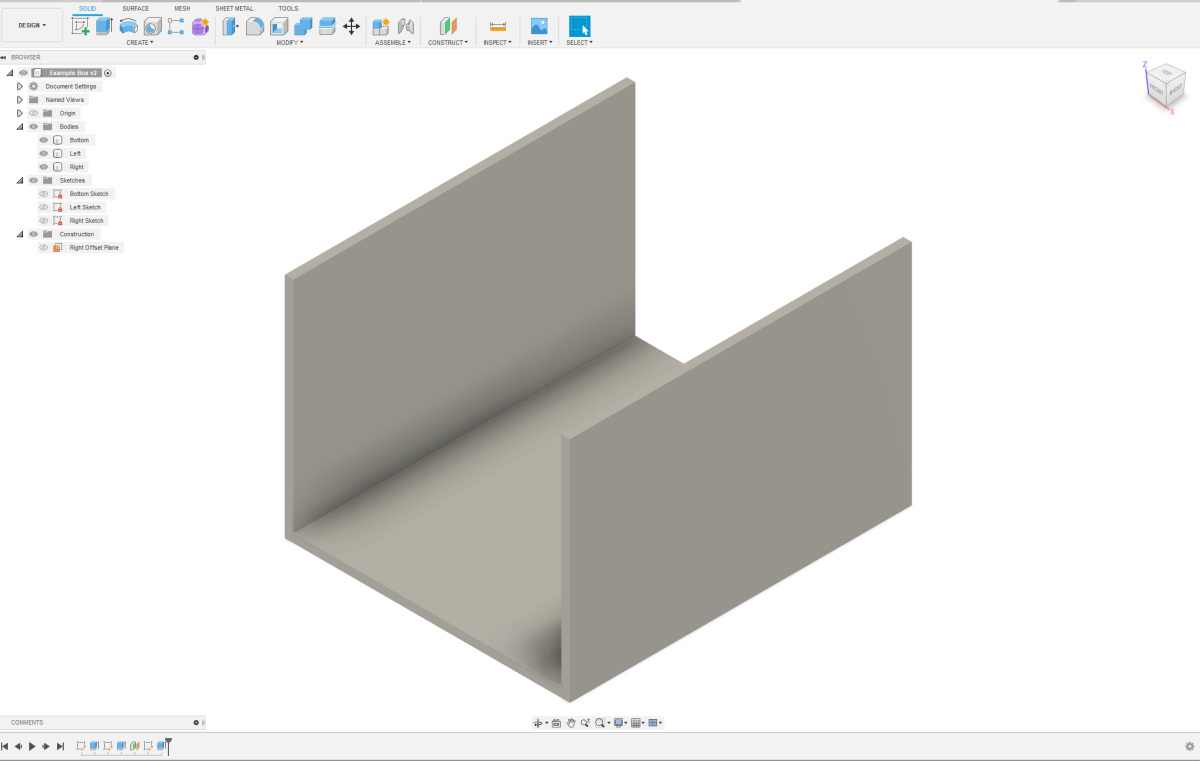 Extrude the new sketch again, but this time towards the left. If the arrow points in the wrong direction, you can enter "-Thickness" to ensure that it extrudes in the correct direction. Make sure to select the option "New Body". You can make bodies, sketches, and construction planes visible and/or invisible to get a better overview. Give your body a logical name. If everything is done correctly, you should now have approximately the same shape as shown here, consisting of three parts. Extrude the new sketch again, but this time towards the left. If the arrow points in the wrong direction, you can enter "-Thickness" to ensure that it extrudes in the correct direction. Make sure to select the option "New Body". You can make bodies, sketches, and construction planes visible and/or invisible to get a better overview. Give your body a logical name. If everything is done correctly, you should now have approximately the same shape as shown here, consisting of three parts. |
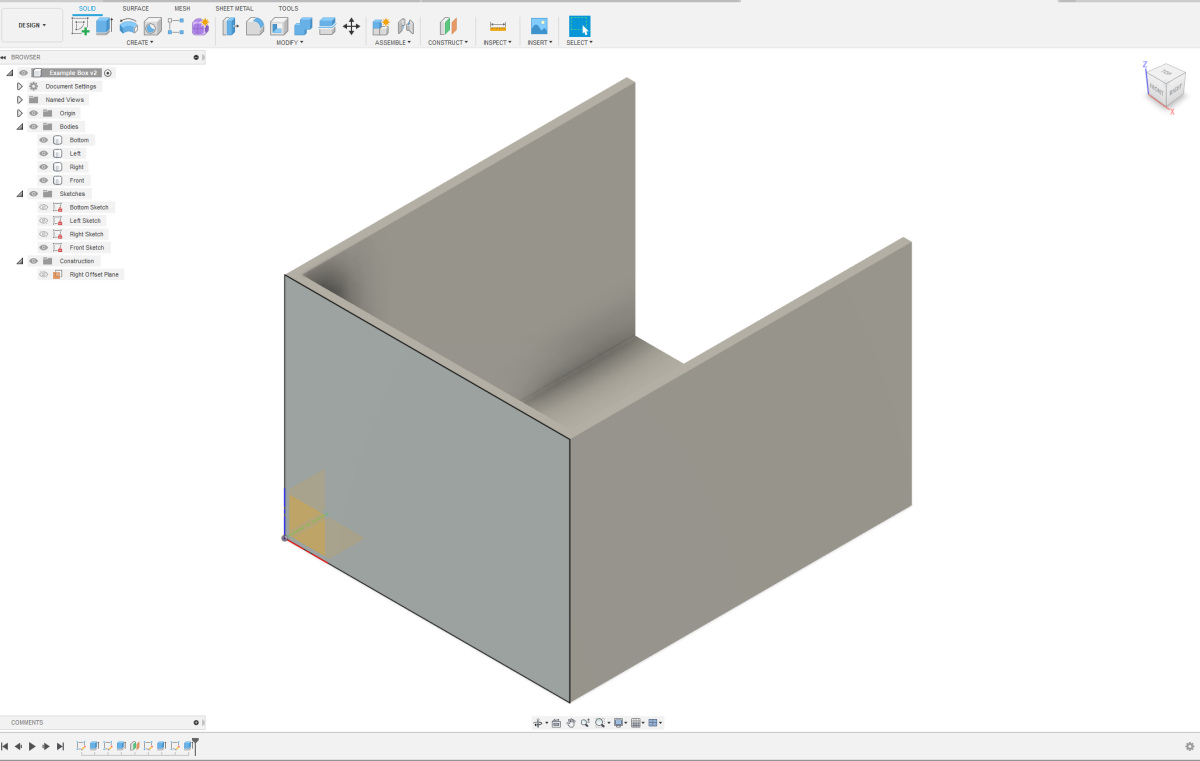 Create the sketch for the front side in a similar manner, extrude the body for the front side, and give everything a logical name. Make sure to extrude the body in the direction of the box. The overall result should now resemble the image shown here. Create the sketch for the front side in a similar manner, extrude the body for the front side, and give everything a logical name. Make sure to extrude the body in the direction of the box. The overall result should now resemble the image shown here. |
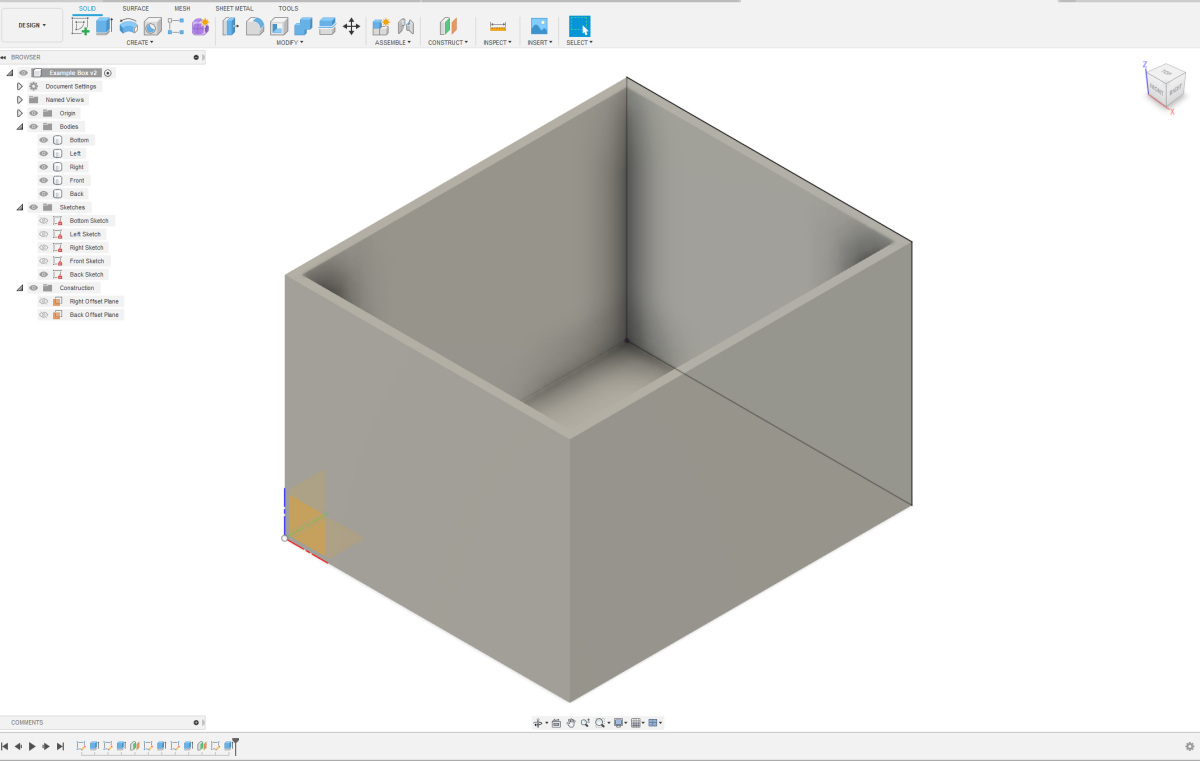 Create an Offset Plane relative to the sketch at the front side to enable the creation of the sketch at the back side. Extrude the body in the direction of the box. Give logical names to the offset plane, the sketch, and the extruded body. The overall result should now resemble the image shown here. Create an Offset Plane relative to the sketch at the front side to enable the creation of the sketch at the back side. Extrude the body in the direction of the box. Give logical names to the offset plane, the sketch, and the extruded body. The overall result should now resemble the image shown here. |