
")
")
Page 3 of 4
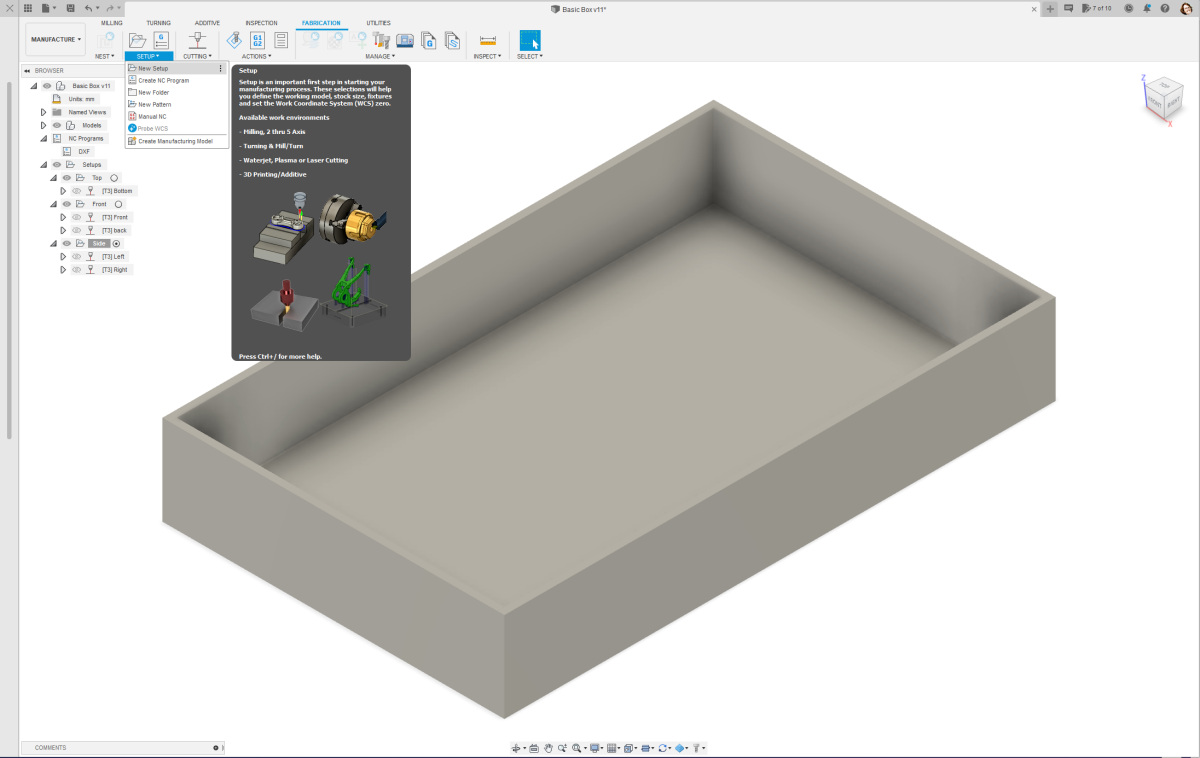 For laser cutting, you need to create a setup for each axis. If you've designed a project where the plates are neatly perpendicular to each other, you'll need 3 setups: one for the X-direction, one for the Y-direction, and one for the Z-direction. Just like I did in the example design I'm using here. For laser cutting, you need to create a setup for each axis. If you've designed a project where the plates are neatly perpendicular to each other, you'll need 3 setups: one for the X-direction, one for the Y-direction, and one for the Z-direction. Just like I did in the example design I'm using here. |
 For each setup, you need to configure a few things. The machine doesn't need to be set up directly. The files are not sent directly to a machine but are first processed in a drawing package that can work with vector files such as CorelDRAW, Illustrator, or Inkscape. For each setup, you need to configure a few things. The machine doesn't need to be set up directly. The files are not sent directly to a machine but are first processed in a drawing package that can work with vector files such as CorelDRAW, Illustrator, or Inkscape. |
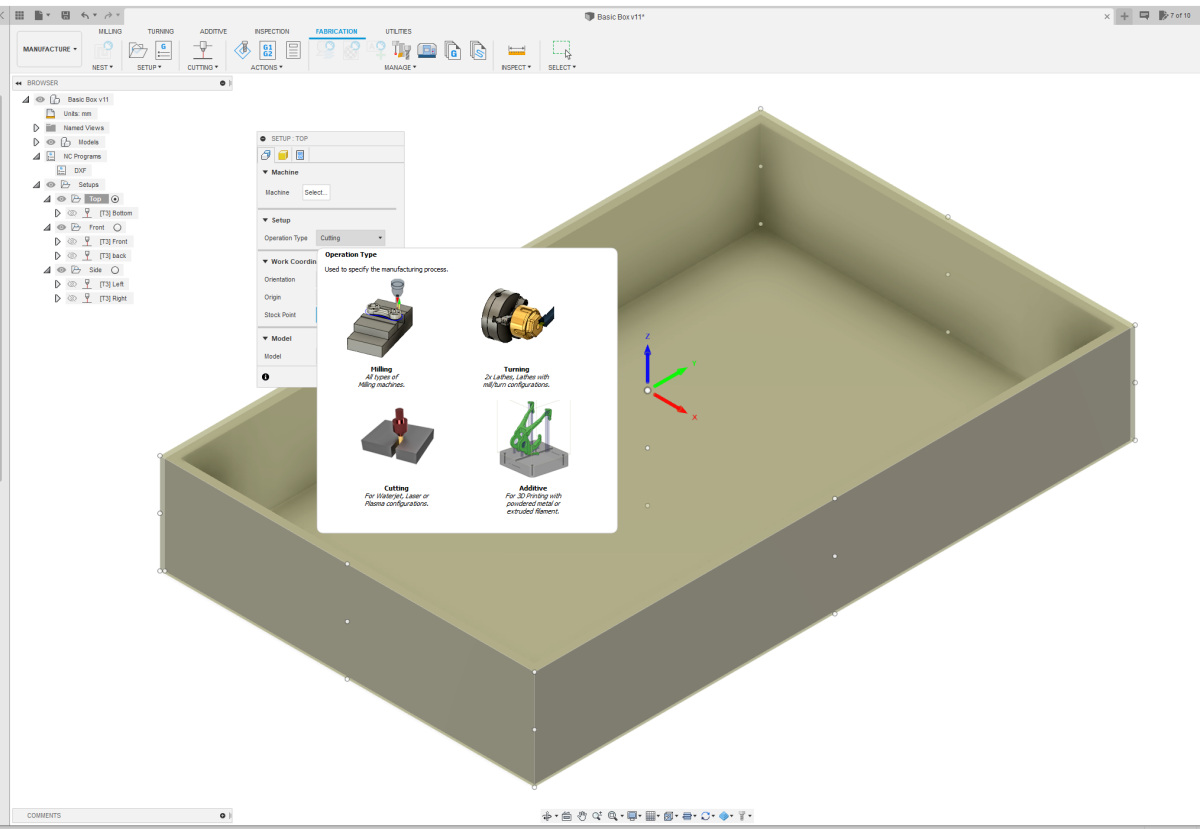 The operation type does need to be set up. This is cutting, as we're going to use it for a laser cutter. The operation type does need to be set up. This is cutting, as we're going to use it for a laser cutter. |
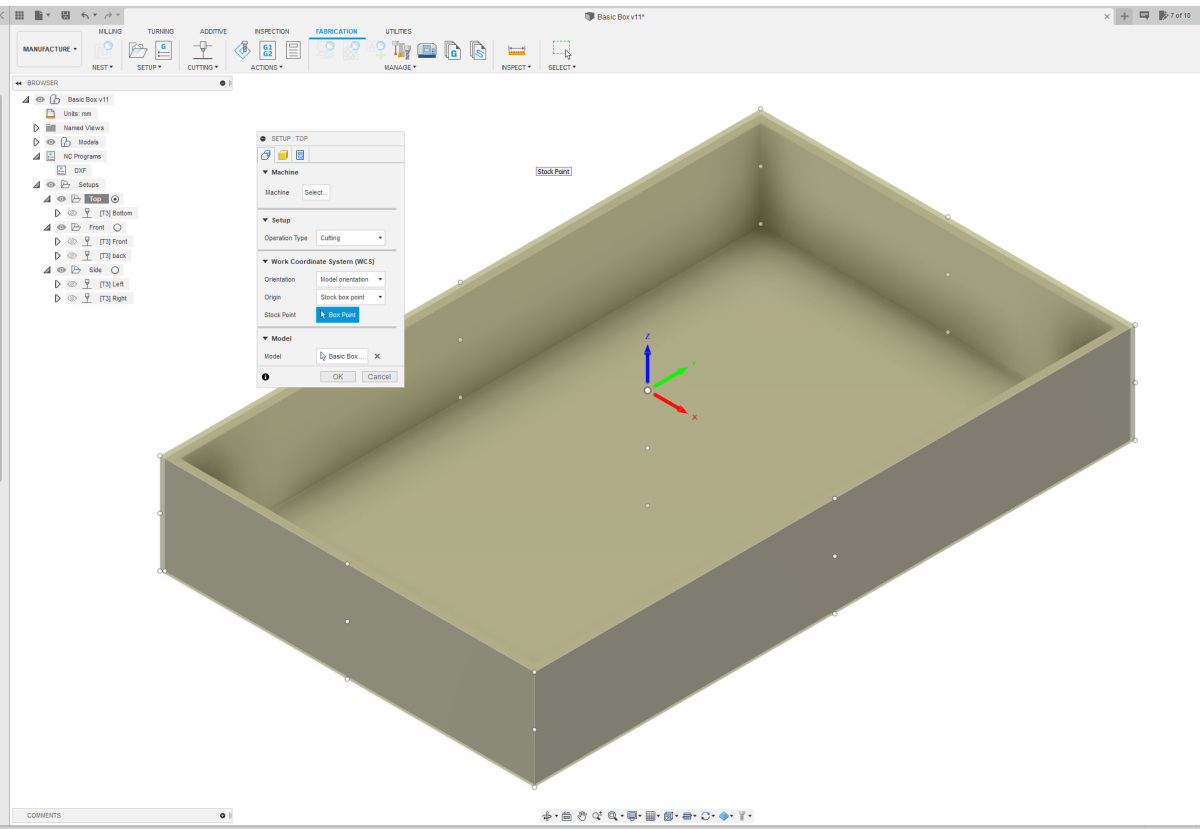
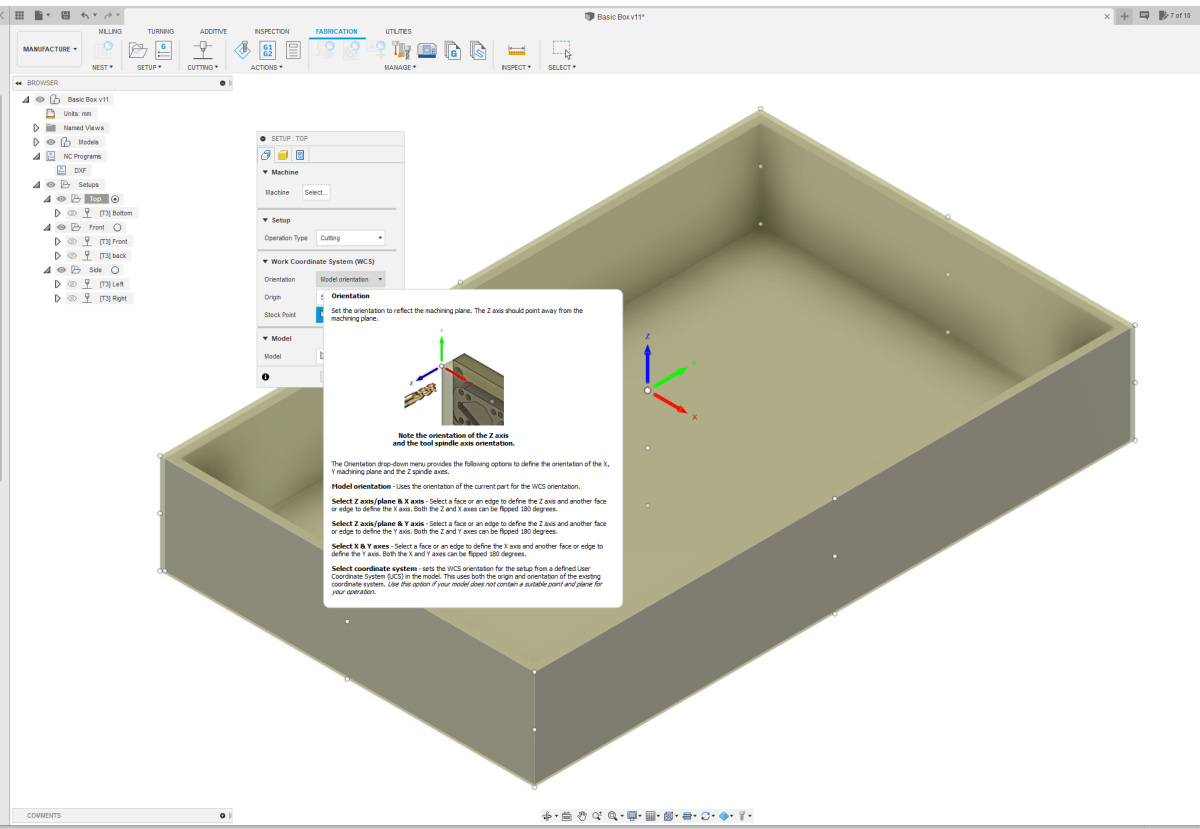 The orientation must also be set up. In the case of the Top view, from top to bottom, I can maintain "model orientation." Origin and Stock point do not need to be adjusted. The orientation must also be set up. In the case of the Top view, from top to bottom, I can maintain "model orientation." Origin and Stock point do not need to be adjusted. |
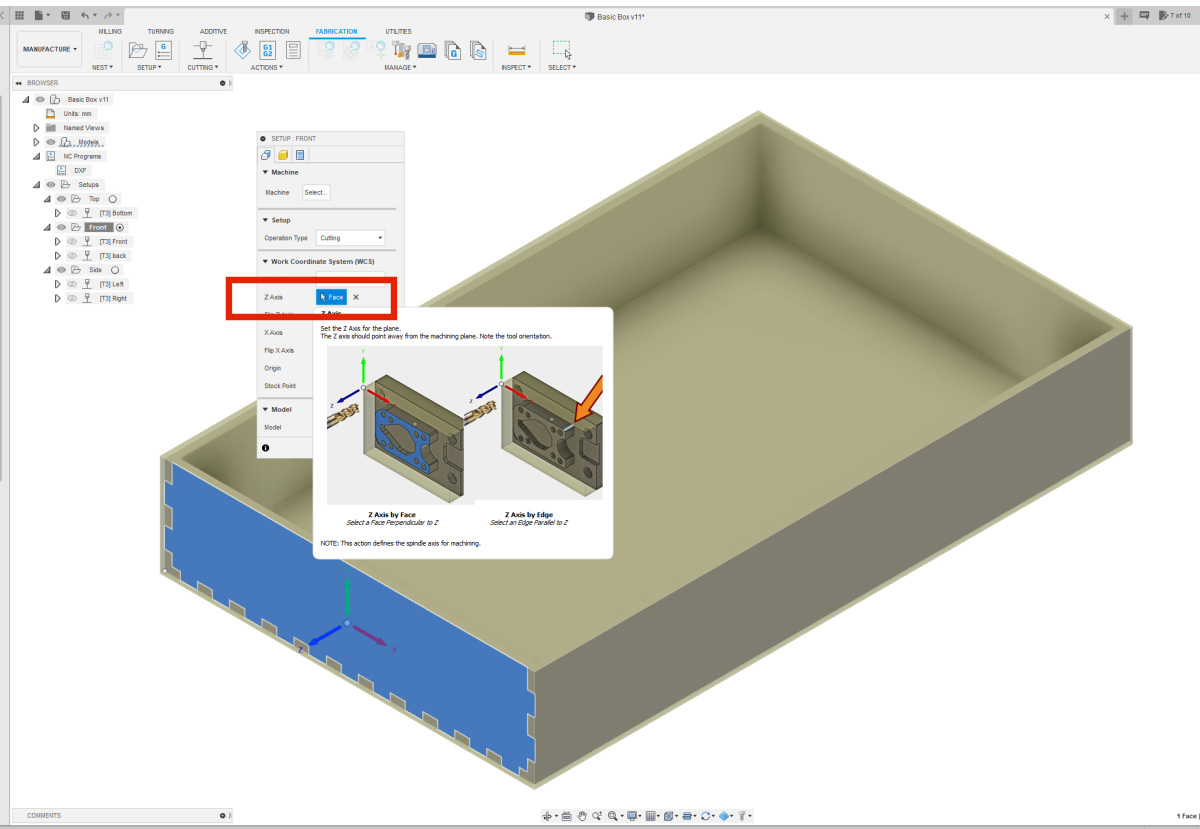 For the other setups, Front and Side, choose the option "Select Z-axis/Plane and X-axis." Then, select the correct plane in the Z-Axis box. For the other setups, Front and Side, choose the option "Select Z-axis/Plane and X-axis." Then, select the correct plane in the Z-Axis box. |
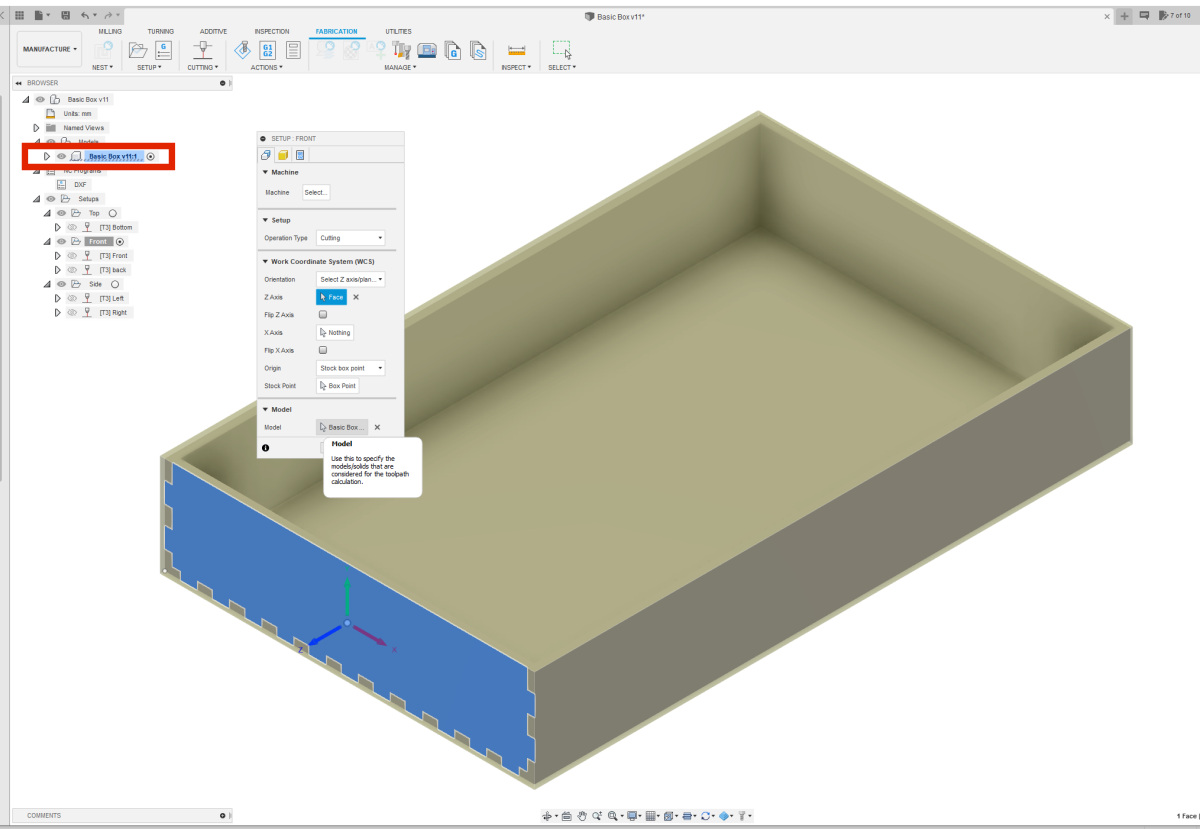 Finally, select your model in the Model section, as outlined in red in the image. Repeat the setup creation for all the directions used in your design. For simple boxes, this is typically three setups. Give your setups logical names so it's clear which parts of your design belong to each setup. Finally, select your model in the Model section, as outlined in red in the image. Repeat the setup creation for all the directions used in your design. For simple boxes, this is typically three setups. Give your setups logical names so it's clear which parts of your design belong to each setup. |