
")
")
Page 2 of 4
 In Fusion 360, I've designed a simple box with finger joints made from sheet material. The various parts are connected with finger joints. I'd like to laser-cut this from 3mm birch plywood. In the design, I've already taken into account the thickness of the material. However, I can only adjust the kerf compensation in the Manufacturing section. In Fusion 360, I've designed a simple box with finger joints made from sheet material. The various parts are connected with finger joints. I'd like to laser-cut this from 3mm birch plywood. In the design, I've already taken into account the thickness of the material. However, I can only adjust the kerf compensation in the Manufacturing section. |
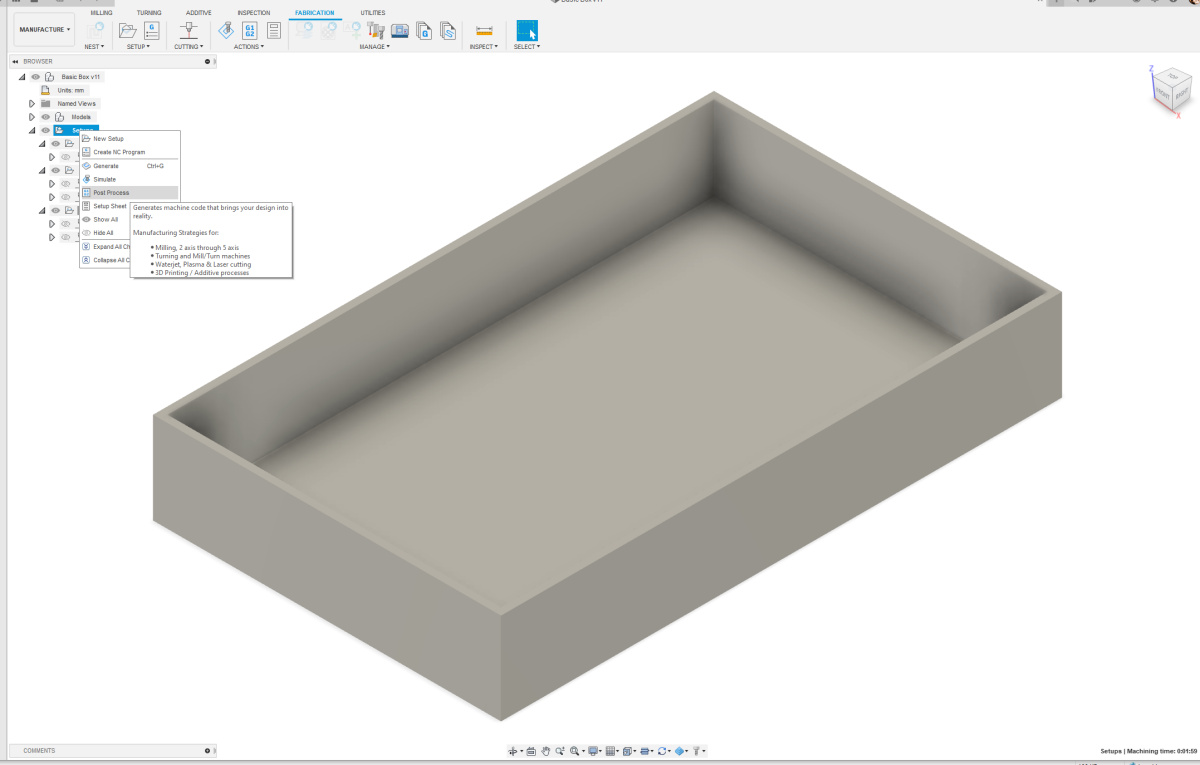 In the image next to this, you can see that the three setups Top, Front, and Side have already been created. Under each setup, the correct profiles have also been made. If I right-click now, I can select the Post Process option. Here, something still needs to be set up so that everything works correctly. In the image next to this, you can see that the three setups Top, Front, and Side have already been created. Under each setup, the correct profiles have also been made. If I right-click now, I can select the Post Process option. Here, something still needs to be set up so that everything works correctly. |
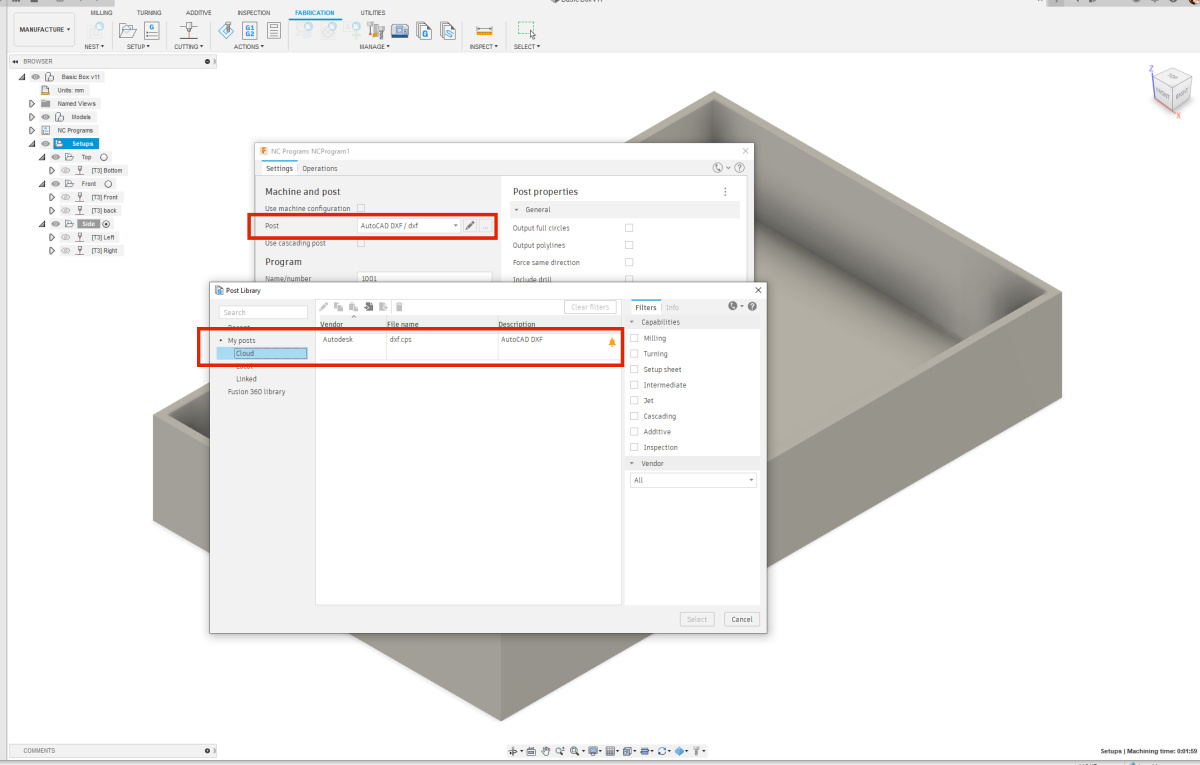 In the Settings tab, under Post, the file dxf.cps needs to be selected. Click on the three dots next to the pencil icon to select this file. You've just uploaded the file to the Cloud. In the Settings tab, under Post, the file dxf.cps needs to be selected. Click on the three dots next to the pencil icon to select this file. You've just uploaded the file to the Cloud. |
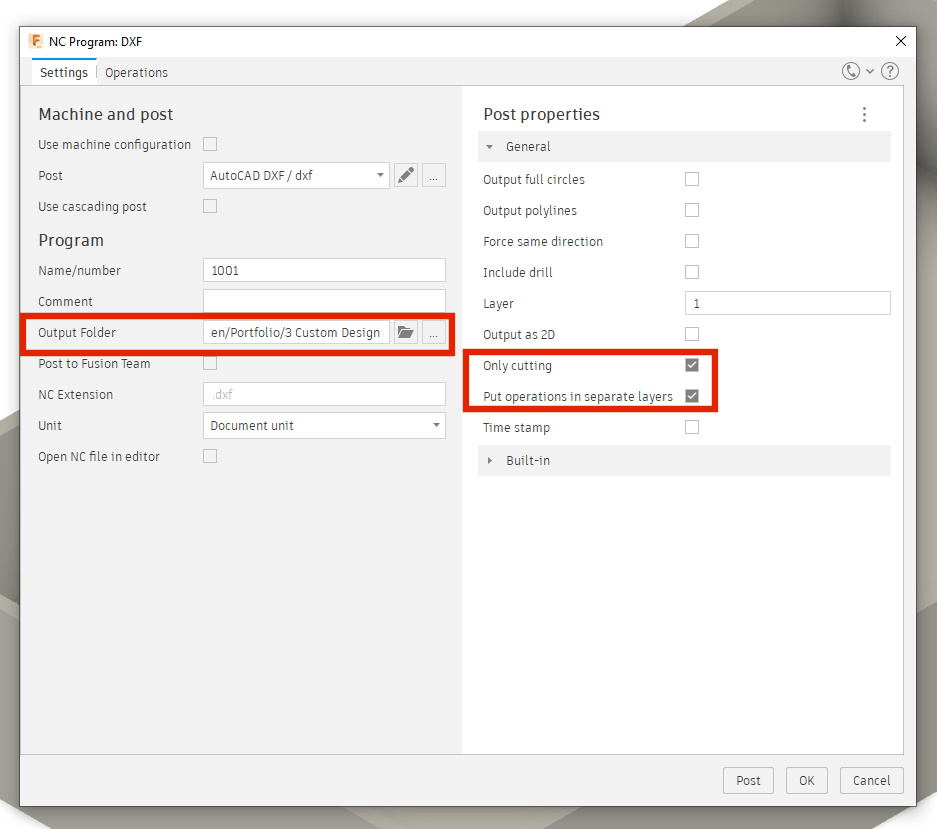 In addition to the post-processor, the output folder can also be set here. On the right side, two options need to be turned on: "Only Cutting" and "Put operations in separate layers." If the options are not visible, you need to click on the three dots in the upper right corner to make them visible.. In addition to the post-processor, the output folder can also be set here. On the right side, two options need to be turned on: "Only Cutting" and "Put operations in separate layers." If the options are not visible, you need to click on the three dots in the upper right corner to make them visible.. |
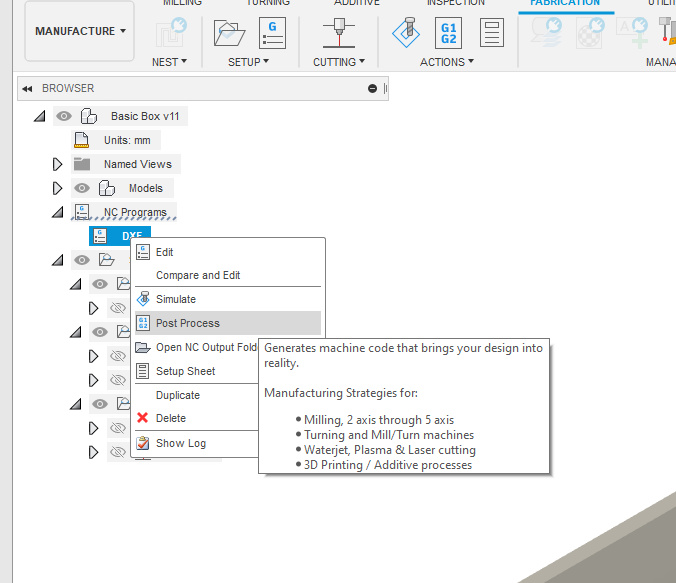 The recently set NC program is now visible under NC programs. I renamed it to DXF. By right-clicking on DXF in my case, you can choose from a number of options. If you want to make changes, you obviously select Edit. If you want to run the post-processor, then choose Post Process. The recently set NC program is now visible under NC programs. I renamed it to DXF. By right-clicking on DXF in my case, you can choose from a number of options. If you want to make changes, you obviously select Edit. If you want to run the post-processor, then choose Post Process. |
| Everything is set up now, but it's definitely challenging, especially in the beginning, to get your setups and profiles right. Let me show you how to do that. |