Method with the Short Sides of the Triangles on the Grain:
|
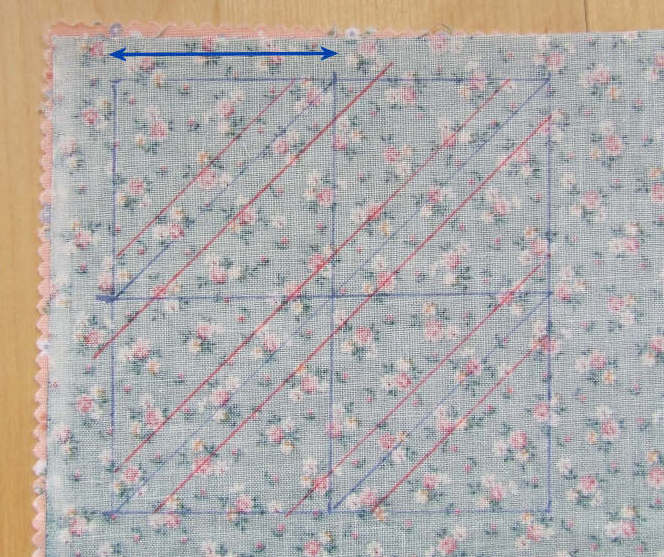
In this method, we draw a pattern of squares on the back of one of the fabric pieces we’re using for the triangles. The squares should be larger than the final blocks because we need the seam allowance. Calculate the size of the squares as follows:
- Inches: width of your block on the pattern without seam allowance + 7/8 inch. So if your pattern shows a block of 1 inch without seam allowance, you draw squares of 1 7/8 inch on the back of your fabric.
- Centimeters: width of your block on the pattern without seam allowance + 1 3/4 cm. So if your pattern shows a block of 2 cm without seam allowance, you draw squares of 3 3/4 cm on the back of your fabric.
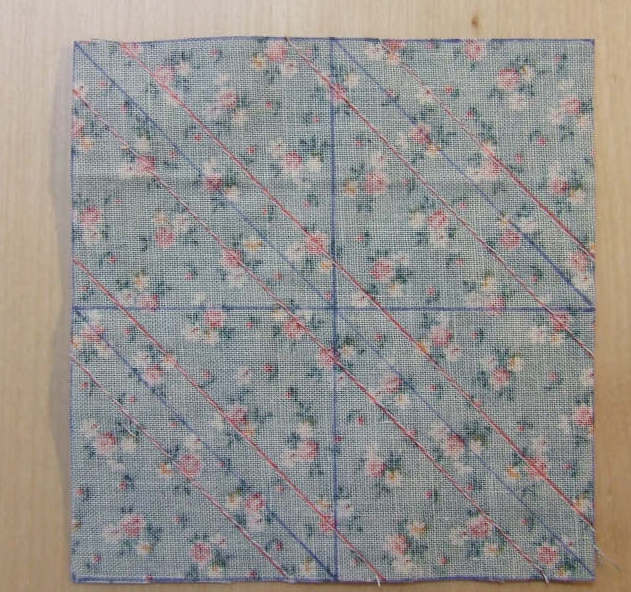
We’re referring to the size indicated by the blue arrow in the image. Since the squares are square, the same size applies to the other side of the squares.
|
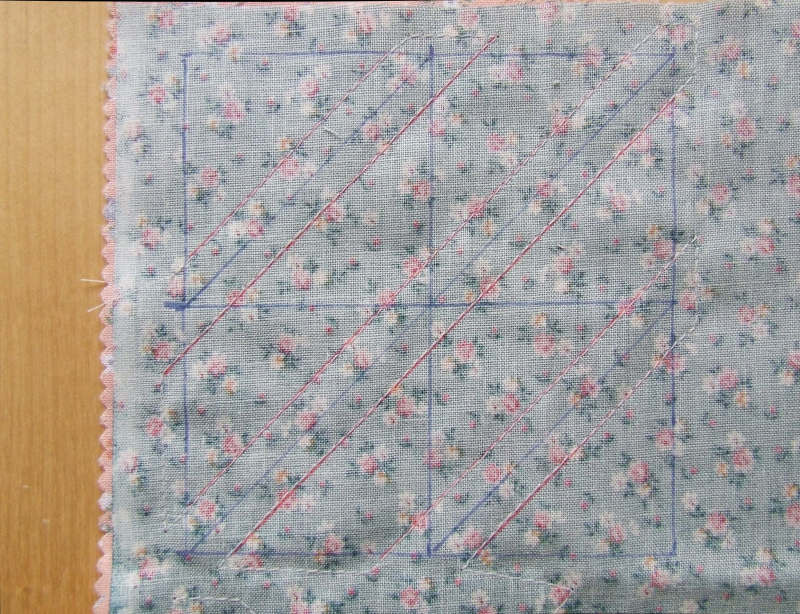
Draw diagonals through the squares, but only one per square. These will be your cutting lines. The cutting lines are shown in blue in the image. Draw a line exactly 1/4 inch on either side of the diagonals. These are the sewing lines. Place both fabric pieces with the right sides together, and the piece with the drawn pattern on top. Sew the fabric pieces together on the sewing lines. All the sewing lines are shown in red in the images. You don’t need to start and stop at each line. You can sew continuously beyond the outer lines of the block since everything outside the blue outline will be cut off later.
If you’re working in centimeters, draw a line 1/2 cm on either side of the diagonals.
|
Once all the sewing lines are stitched, you can cut out the block along the outer edges through both layers of fabric. You don’t need to add extra seam allowance; it’s already included in your block.
|
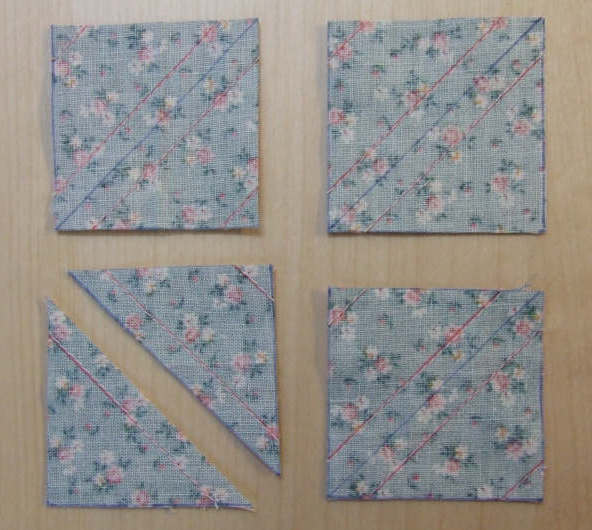
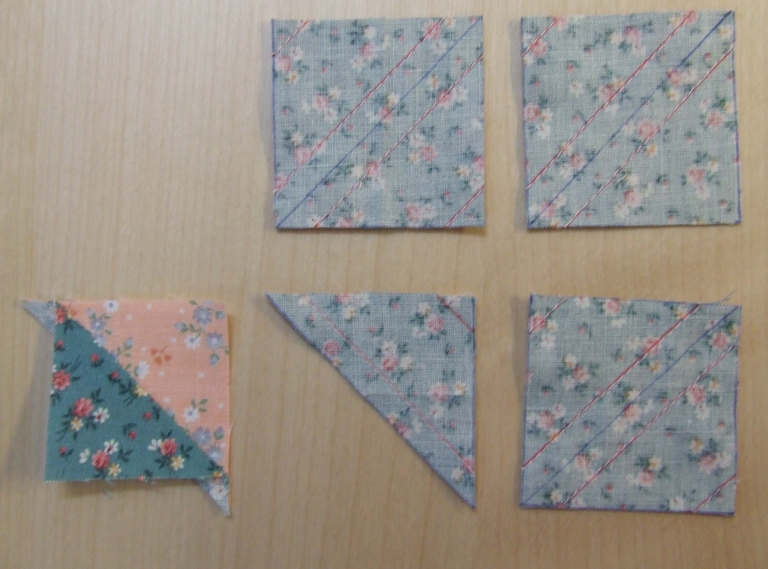
Now you can cut out the small squares. Cut as precisely as possible along the blue lines. Once you’ve done this, you can finally cut the diagonals. You’ll see that sometimes a small extra corner is sewn onto a block. Carefully remove this. These are small pieces, so it shouldn’t be too difficult. Each drawn square ultimately yields two blocks.
|
Now you only need to press your triangles. If you need more than the 8 blocks from this example, you can, of course, draw more squares. For example, if you need 12 blocks, calculate the number of blocks as follows:
12/2 = 6 squares. 6 is 2 times 3. So you can draw a large block of 2 by 3 squares.
|


