| I find the entire photo unsuitable for replicating with linoleum; it's too crowded. I choose to extract a cutout from the image, which I will further develop. I adjust both the cutout and the piece of linoleum I'm using to match each other in size immediately to avoid problems later. Both the cutout and the linoleum have a ratio of 5:6. My linoleum measures 25 by 30 cm. |
| Linoleum cutting is a printing technique. In printing techniques, the print is generally mirrored. However, I want my print to match the image I've chosen, so I mirror the image before further editing to avoid forgetting later. |
| Linoleum cutting is a technique where you can use multiple colors. However, this requires some practice. The colors are printed one by one, and the prints must align exactly. For this first attempt, I won't make it too difficult and will make a print in one color only. I need to convert my chosen image into a two-color image: the background color (usually white paper) and the ink color. It can be any color as long as it contrasts with the paper. I will edit the image in Paint Shop Pro 9 until I'm satisfied. The actions I'm taking are quite general and can be done with many drawing packages. To start, I'll increase the contrast to enhance the difference between, for example, hair and skin. |
| Paint Shop Pro has a fun function called "posterize." This allows you to specify how many shades a picture should be divided into. This function can be applied to both color and grayscale images, but for what I want to do, I need to convert the image to grayscale first. Essentially, I now only have black and white in my picture, although it's not yet suitable for linoleum. |
| NNow that the image has been converted to grayscale, I will use the "posterize" function. I choose 2 shades. After the function is executed, I only have black and white in my picture. That's precisely what I need to convert it into a linocut. However, I'm still not entirely satisfied with the details. I can never get the exact details I want; for example, the eyes are missing. That's okay; I have a good starting point, and I'll add the details myself. |
| I combine the black and white version with the original cutout. For example, you can see that the eyes are now visible again. I also added some more contour to the cheeks, a collar because I like it, and a background of circles. In linoleum cutting, there shouldn't be too large cutout areas. Paper can be pressed into those areas, causing unwanted ink stains on your print. A good linocut has a ratio of about 50% between the cutout parts and the uncut parts. |

")
")
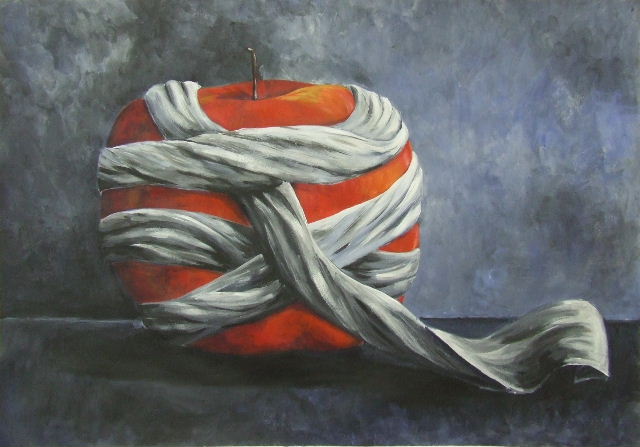
 I have had tools and materials for cutting linoleum for ages but have never actually gotten around to it. The last time I really cut linoleum was at least 30 years ago. Time for a refresher course. I am going to use the attached photo as a starting point. Hopefully, this article will inspire more people to try linoleum cutting. It's actually a very simple but enjoyable technique.
 I find the entire photo unsuitable for replicating with linoleum; it's too crowded. I choose to extract a cutout from the image, which I will further develop. I adjust both the cutout and the piece of linoleum I'm using to match each other in size immediately to avoid problems later. Both the cutout and the linoleum have a ratio of 5:6. My linoleum measures 25 by 30 cm.
 Linoleum cutting is a printing technique. In printing techniques, the print is generally mirrored. However, I want my print to match the image I've chosen, so I mirror the image before further editing to avoid forgetting later.
 Linoleum cutting is a technique where you can use multiple colors. However, this requires some practice. The colors are printed one by one, and the prints must align exactly. For this first attempt, I won't make it too difficult and will make a print in one color only. I need to convert my chosen image into a two-color image: the background color (usually white paper) and the ink color. It can be any color as long as it contrasts with the paper. I will edit the image in Paint Shop Pro 9 until I'm satisfied. The actions I'm taking are quite general and can be done with many drawing packages. To start, I'll increase the contrast to enhance the difference between, for example, hair and skin.
 Paint Shop Pro has a fun function called "posterize." This allows you to specify how many shades a picture should be divided into. This function can be applied to both color and grayscale images, but for what I want to do, I need to convert the image to grayscale first. Essentially, I now only have black and white in my picture, although it's not yet suitable for linoleum.
 NNow that the image has been converted to grayscale, I will use the "posterize" function. I choose 2 shades. After the function is executed, I only have black and white in my picture. That's precisely what I need to convert it into a linocut. However, I'm still not entirely satisfied with the details. I can never get the exact details I want; for example, the eyes are missing. That's okay; I have a good starting point, and I'll add the details myself.
 I combine the black and white version with the original cutout. For example, you can see that the eyes are now visible again. I also added some more contour to the cheeks, a collar because I like it, and a background of circles. In linoleum cutting, there shouldn't be too large cutout areas. Paper can be pressed into those areas, causing unwanted ink stains on your print. A good linocut has a ratio of about 50% between the cutout parts and the uncut parts.